Showing posts with label herb. Show all posts

Thursday, December 6, 2012

DIY Beef Dog Chews

If you own a dog, then no doubt you'll agree that your canine is just as much a part of your family as your spouse or kids. So of course you'll be including Fido in your holiday gift-giving! This year, I decided to make my dogs Lucy, Susse and Buddy homemade beef chews for their Christmas gifts. Of course I let them sample some ahead of time and they loved them!

These chews are incredibly easy to make and super inexpensive. Better yet, they're super healthy. Store-bought dog chews and treats often contain additives and preservatives, just like a lot of 'human food.' By making the chews at home, you know exactly what you're feeding your dog. Also, if you're an 'all-natural nut' like me, making them from scratch gives you the opportunity to add wholesome ingredients to make them that much healthier! (See below for flavor suggestions that pack a healthy punch!) Your pup will love these stocking stuffers, and I hope you enjoy making them as much as I did!

Flavoring ideas and their health benefits
You can develop your own custom flavors by adding different herbs and spices to the beef before drying. Aside from the additional flavor they bring, incorporating these ingredients into their treats can be very beneficial to your dogs health. Since I'm a big fan of herbs and spices used for health purposes, and a strong believer in their effectiveness, I've decided to share a list of a few herbs that may be helpful in alleviating and/or preventing health problems in your dog. Of course, your dog doesn't have to be suffering from any of these issues in order to enjoy these flavorings- He'll just be enjoying a super delicious snack that happens to be healthy, too!
 
Bad breath - Parsley, Rosemary
To repel ticks and fleas - Garlic
Digestive discomfort - Ginger, Catnip, Chamomile, Basil
Inflammation (arthritis, injuries, skin irritations, etc) - Chamomile, Rosemary, Basil 
Anxiety/nervousness - Chamomile, Catnip
Boost immune function - Garlic, Ginger, Sage, Oregano
Infection - Sage, Oregano, Thyme

Complete list of safe herbs for dogs

Feel free to mix and match and experiment with different herbs and spices- just make sure to research an ingredient to be sure it is safe for dogs before using it in the chews. I don't recommend adding salt, as too much sodium is not good for your dog. Also, avoid using spicy seasonings, like black pepper or cayenne.

What You Need

Very lean beef - Beef top round steak, flank steak or rump roast
Dried herbs or spices of your choice (optional)
Butcher twine or string
Wire rack (I used a cookie cooling rack)

 Method

Slice the beef (with the grain) into strips, about 1/4 - 1/2 inch thick and 4 - 6 inches long. (For easier cutting, place the meat in the freezer prior to slicing just until ice crystals begin to form)

Pat meat dry with a paper towel

If you're seasoning the meat, roll the strips in the herbs or spices of your choice, or sprinkle over top.

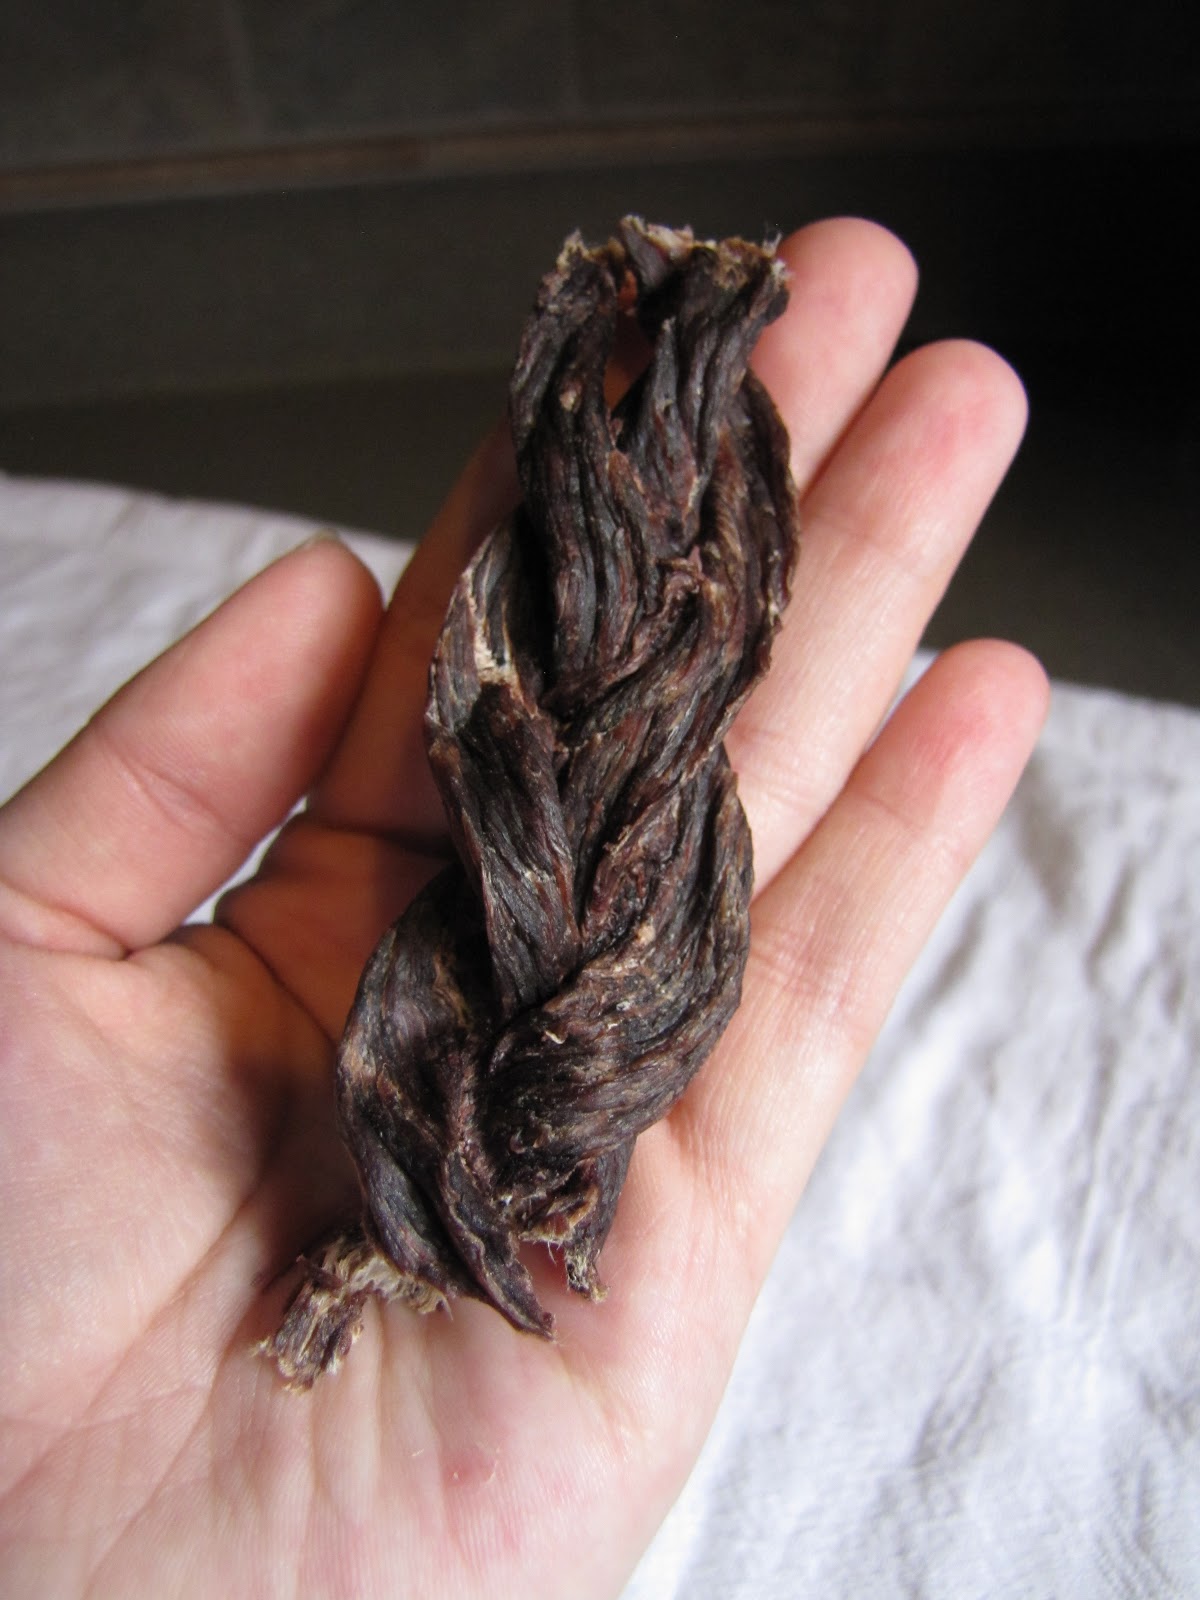
Use a piece of twine to tie 3 strips of meat together at one end. Tightly braid the strips, then tie the bottom ends together with another piece of twine.

Use the convection setting on your oven, and heat to 130 degree Fahrenheit. (Convection is ideal, because it circulates the air around the meat.) If your oven does not have a convection setting, heat to 150 degrees and leave the oven door open a crack.

Place braids on wire rack and put in oven. Cook for 4-5 hours. Turn down the oven temperature to its lowest setting and continue cooking braids for several hours. My oven's lowest temperature is 100 degrees, so I left the braids to finish drying overnight. If your oven does not go that low, just use the lowest possible temperature and allow the braids to dry another 3-5 hours. The braids are finished drying when they have shrunk to about half their size, are a dark color and are hard.

Untie the ends of the braids. The braids are ready to be devoured!

Store in an air-tight container or zip-top bag. 

Happy Holidays!

Thursday, October 4, 2012

How to: Preserve Basil for quick and easy use

I love Basil. It's my favorite herb and I try to add it to as many dishes as possible. The problem? It spoils so quickly, and I don't always have the time to chop it up every time I want to use it. So, I came up with an easy way to keep it on hand without having to worry about it spoiling or needing to chop it.  This technique provides perfect portions to add to any soup, sauce or other recipes. You can use this technique for other herbs or even grated garlic or ginger. Get creative!

I went to the produce section of my grocery store and picked up a tube of pureed Basil. I was hesitant the first time I tried it, but it tastes the same as the fresh stuff. Plus, for the amount you get, it's a lot cheaper than those individual packs. Of course, if you want to use fresh Basil, you can. Just use a food precessor or blender and puree the leaves with just enough water or olive oil to form a paste.


Lay out a sheet of plastic wrap. Squeeze the Basil paste into a line about an inch wide, leaving about 2 inches on either end of the line. If you pureed your own Basil, you can use a piping bag or a plastic zip-top bag with the corner snipped off to pipe the paste.


Fold the plastic wrap in half and roll the Basil into a log. (Sort of like a jelly roll) Make sure it's tight- this is crucial for even portioning, and so it doesn't squeeze out all over the place!


Twist the ends of the plastic wrap, and tie each into a knot. Now, take the entire log, and roll it in another sheet of plastic wrap, and twist and tie the ends again.

Place the roll in the freezer until completely frozen.

 
Unwrap the roll and slice into several equal size portions. The Basil thaws pretty quickly, so you might want to pop the slices back into the freezer on a cutting board or cookie sheet for just a few minutes to prevent freezing together during storage.


 Place the slices into a zip top bag and store in the freezer. Now, next time you're making pizza sauce or soup, you can grab one or two slices of the Basil and pop them straight into the pan- no chopping required!

Monday, February 15, 2010

Lemon and Herb Whole Wheat Pasta

All the 'Eating' holidays have passed: Halloween, Thanksgiving, Christmas, New Years and Valentines day. Whoever made up these holidays were smart to place them in the winter- when those extra pounds you gain are hidden under your sweaters and coats! As quickly as Valentines day has passed, so has my chocolate craze; It's back to healthy eating, and that means healthier recipes, too!

Many people who follow a healthy diet tend to avoid pasta. It's filled with starchy carbs and little nutritional value. I love pasta, and it was one of the hardest foods to 'give up.' However, I recently discovered Whole Wheat pasta. I always saw it in the grocery store, but I expected that common aftertaste that accompanies many wheat foods. What I found, though, was a flavorful spaghetti that I happen like better than the white pastas. And it's packed with fiber and protein and just 180 calories per serving.

This recipe goes beyond being good for your figure: Garlic is potent with antioxidants and is known to help prevent cancer and heart disease. It's also a natural antibiotic, helping to ward off colds. Olive oil contains monounsaturated fats, the 'good' fats. Olive oil also contains antioxidants which can promote heart health. Lemon also contains antioxidants which have anti-cancer properties, as well as tons of Vitamin C! Rosemary ALSO contains anti-cancer properties and can act as a mild diuretic, helping reduce inflammation in the body. Besides this recipe being delicious, it's great for your weight and health...So get cooking!

Lemon and Herb Whole Wheat Pasta
Makes 1 serving
2 ounces (or 1 serving) Whole Wheat spaghetti (I like Ronzoni Healthy Harvest)
1 medium clove garlic
1 teaspoon total of dried or fresh herbs such as rosemary, basil, oregano
1 teaspoon lemon zest
1 teaspoon olive oil
fresh lemon juice
sea salt
pinch black pepper

1. Prepare the pasta as according to the package, making sure to generously salt the water.
2. While the spaghetti is cooking, finely mince the garlic.
3. Combine herbs, a pinch salt and black pepper and garlic.
4. Using the side of a large knife, form a paste by dragging the knife repeatedly over the garlic mixture. (Use a few drops of olive oil if needed)
5. Combine the lemon zest and garlic paste together.
6. When the spaghetti is cooked, drain and rinse.
7. Empty the water from the spaghetti pot, and return to medium-low heat.
8. Heat the olive in the pot, and stir in the garlic, lemon and herb paste.
9. Finally, add the pasta to the pot, and toss with the oil and garlic and herbs, until heated.
10. Serve with a pinch of lemon zest, and a squeeze of fresh lemon juice. Enjoy!