Tuesday, October 26, 2010

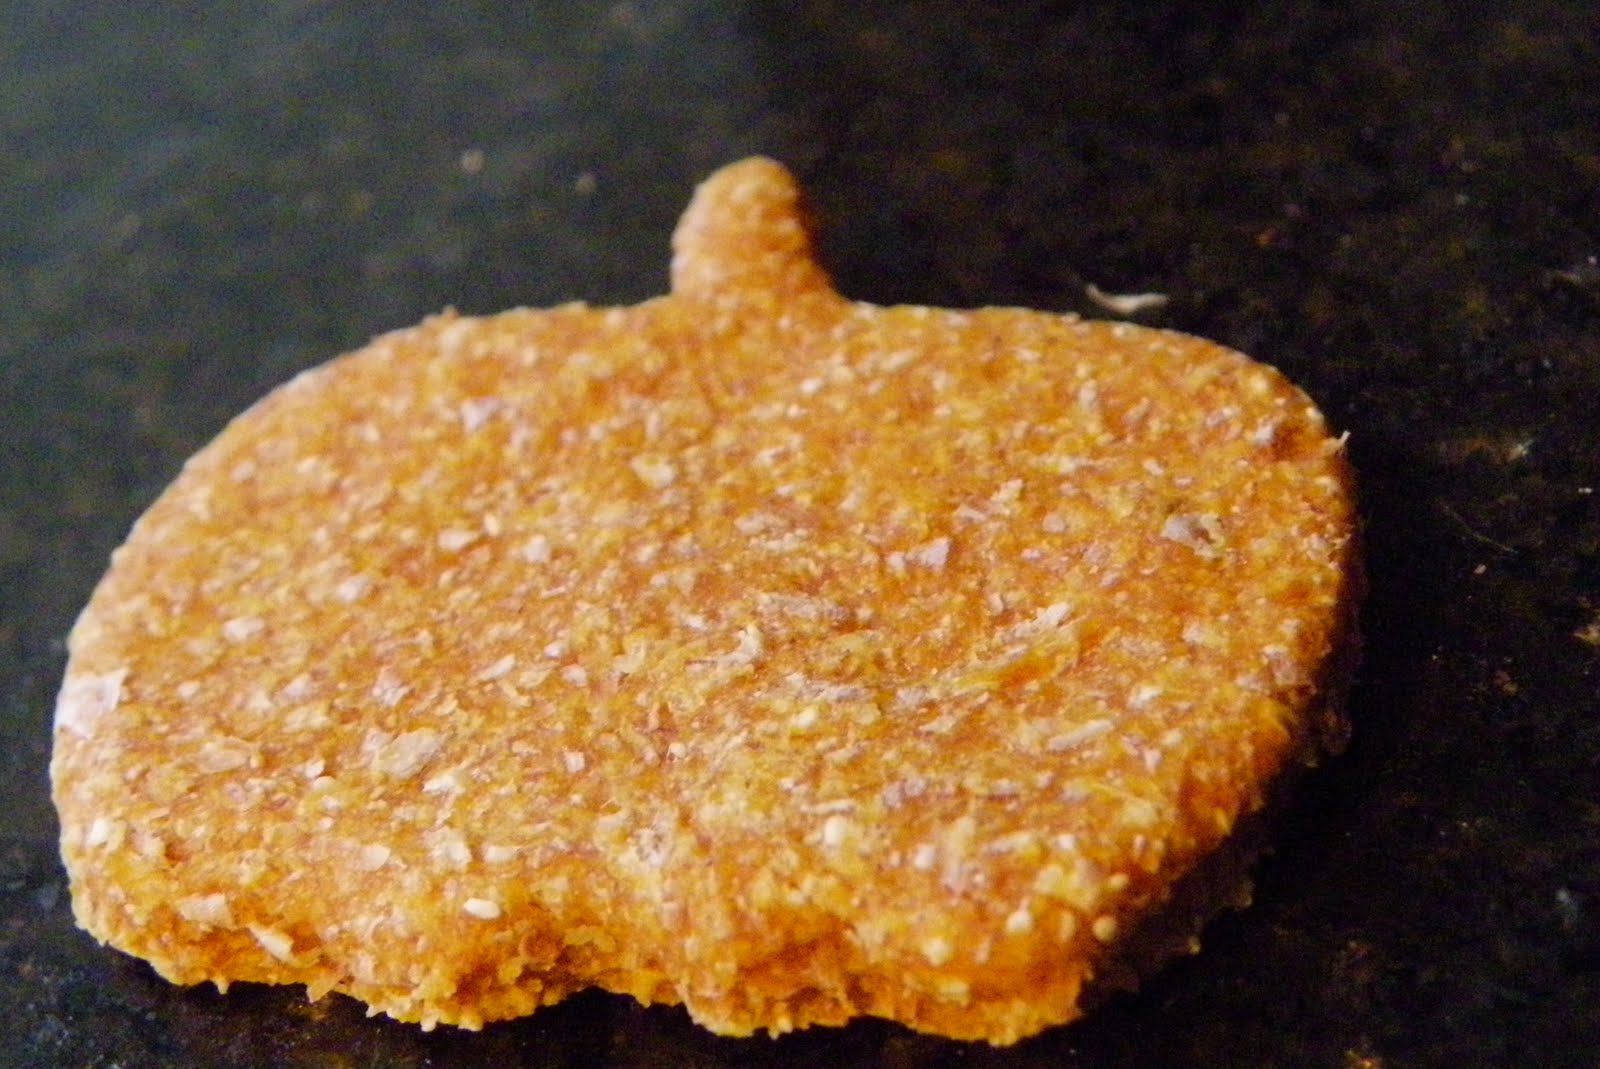
Pumpkin Dog Biscuits

With just 5 days left until Halloween, pumpkins are everywhere! You may know that pumpkin is packed with powerful nutrients. But did you know that these nutrients are beneficial to your dog, too? The fiber in pumpkins has long been a cure for dogs with gastrointestinal issues. But many of the vitamins and minerals found in this popular squash work the same way in dogs as they do humans. Vitamin C helps boost immune function, potassium promotes bone strength, Beta- and Alpha- carotenes help ward off cancer, and Vitamin A protects eyes from cataracts- a big concern for older dogs.

I love my dogs like family, so I wanted to create a healthy treat for them to enjoy. In light of the upcoming holiday, I decided to make these Pumpkin Biscuits. They're really easy to make, and very healthy too- no fat! Just make sure to let the family know they're for the pets, because they look identical to cookies! If you get a lot of tag-along canine trick-or-treaters, these make wonderful treat bags. Just wrap a few biscuits in cellophane, and tie with orange and black ribbons. The dogs will love them, and the kids will be just as excited. Happy Halloween!


Pumpkin Dog Biscuits

2 1/4 cup whole wheat flour
1/4 cup old fashioned oats (uncooked)
1/4 cup cornmeal
1/2 cup canned pumpkin
2 egg whites
pinch cinnamon

Preheat oven to 275. In a large mixing bowl, combine dry ingredients. In a separate bowl combine pumpkin and egg whites. With a large spoon, mix wet ingredients into dry ingredients. Once the mixture has come just come together, use your hands to incorporate all the ingredients together and form a large ball. The dough should be slightly tacky but not sticky. Knead more flour into the dough if it is too sticky. Roll out the dough with a rolling pin to about 1/8 inch thick. Use cookie cutters (I used pumpkins, and maple leaves) to cut out shapes. Bake the biscuits on a foil or parchment lined cookie sheet for about 1 to 1 1/2 hours, or until hard. Cool the biscuits on a cooling rack.

Tuesday, October 12, 2010

Roasted Pumpkin Seeds

This October when you're carving a pumpkin, save the seeds. They're so easy to roast, and they make a delicious, healthy snack. Pumpkin seeds, also known as Pepitas, are packed with all kinds of nutrients, such as manganese, magnesium, iron, vitamin K, and protein.

Roasting your own pumpkin seeds is a fun activity for the whole family. There's something special and rewarding about eating pumpkin seeds that you've harvested, cleaned, roasted and seasoned. Store-bought seeds are no match for homemade!

I've included basic instructions and recipes on how to prepare the seeds, but it's up to you to experiment and tweak the seasonings to your liking. There's no right or wrong way to make them. If you have a favorite combination of seasonings and spices, please share!

Harvesting and Cleaning the Seeds
Different pumpkins have different seeds. Your typical carving pumpkin provides large seeds with a white husk. Small baking pumpkins have little seeds without the husk. What kind you use is completely personal preference. If you just like the inside seed, go with the baking pumpkin. If you like the tough husk, use the carving pumpkin.

Cut off the top of the pumpkin and scoop out the seeds and pulp. Separate the seeds, you don't need the pulp so throw it away, or even better, toss it in your compost pile. Put the seeds in a colander or strainer, and rinse under warm water, cleaning off any leftover pulp and goop (yes, that's a technical term). Once the seeds are clean, shake off all remaining water, and transfer them to a tea towel. Spread the seeds over the towel in a single layer, and roll up the towel. Let the seeds dry completely.

Roasting the Seeds
There's a few ways you can roast your seeds. You can use a Silpat (a silicone baking sheet), a cookie sheet lined with foil, or my favorite, parchment paper with holes. The first two are pretty straightforward. I like to use the parchment paper method because it allows air to circulate underneath the seeds, which leads them to cook more evenly and be very crunchy. It just takes a few minutes, and from my experience, is well worth the time.

First, place a cooling rack on top of a cookie sheet. Place a piece of parchment paper on top of the cooling rack, large enough to be tucked underneath the rack on the sides. Using something small and sharp to poke holes all over the paper. (Think push pin or an eyeglass screw driver) The holes need to be large enough to allow air to circulate underneath the seeds, but small enough so the seeds don't fall through. You need a lot of holes.

We're ready to roast. Spread the seeds on your surface of choice If you have a convection oven, preheat it to 325 and cook the seeds for about 8-10 minutes. If you have a conventional oven, preheat it to 350, and cook the seeds for 10-15 minutes. Again, cooking time is personal preference. If you like your seeds a bit chewy, cook them for a shorter amount of time. If you like them very crunchy, cook them for a longer amount of time. Just keep an eye on them, because once they're burnt, they're burnt.

Just about every recipe I found online seasoning the seeds before roasting. This way, you can cook all the seeds at once, then divide them and season them, instead of having to use a different pan for each 'flavor.' So following are a few basic recipes. Again, personal preference. Alter, experiment, omit. Use these recipes as a starting point.

Garlic and Herb
1/4 cup roasted seeds

1/8 teaspoon garlic salt

1/4 teaspoon dried thyme

1/4 teaspoon dried basil

1/4 teaspoon dried rosemary

Olive oil

Combine the salt and herbs together. Very lightly coat the seeds with olive oil, and add them to the herb mixture. Toss to coat, and spread the seeds on parchment paper to dry.


Black Pepper, Sea Salt and Olive Oil
1/4 cup roasted seeds

1/4 tsp olive oil

black pepper

sea salt

Toss the seeds with the olive oil. Next, season the seeds with black pepper and sea salt to taste. Spread the seeds on parchment paper to dry.


Autumn Spice Candied Pumpkin Seeds
1/4 cup roasted seeds

1 teaspoon maple sugar (brown sugar works fine, but maple sugar is really spectacular)

1/8 teaspoon cinnamon

a pinch of ground ginger

a pinch of nutmeg

water

In a small bowl, combine just enough water with the maple sugar to make a think paste. (1 or 2 drops is plenty.) Heat in the microwave for 5 second intervals, until the sugar has melted. Stir in the cinnamon, ginger and nutmeg. Add the pumpkin seeds and stir to coat. Pour the seeds back onto a nonstick baking surface (parchment or Silpat) at 350 for 2-3 minutes. Remove from the oven and let cool on the baking sheet.


Make your own recipe by experimenting with different herbs and spice. A few may include cayenne, paprika, oregano, cumin, and seasoning salts.

Store the seeds in a zip-top bag in a cool, dry place. Enjoy!
Friday, October 8, 2010

Tri-Color Asian Salad


I'm all about simplicity. Less is very often more. That's why this salad has 3 main ingredients, cucumber, carrot, and jicama, and a very simple dressing. It's light, fresh and wonderfully crunchy. If you've never tried jicama, this is a great opportunity. Jicama is a root that looks like a turnip. It is very sweet, and it's texture is similar to a potato. This salad is low in calories and packed with nutrients. This dish is also a perfect time to practice your knife skills. We'll be cutting the carrots into batonnets (1/4 x 1/4 x 2-2 1/2 inches), and julienning (1/8 x 1/8 x 2-2 1/2 inches) the jicama, and simply cutting the cucumber slices into 6 equal pieces. To learn how to batonnet click here. To learn how to julienne, click here.

Tri-Color Asian Salad
Serves one

12 slices peeled cucumber, each cut into six pieces
8 baby carrots, batonnet
1/3 cup julliened jicama
1 teaspoon orange juice
1 teaspoon soy sauce
1/2 teaspoon rice wine vinegar
1/8 teaspoon honey
Pinch freshly grated ginger
Pinch freshly grated lemon zest
Black pepper to taste
Sesame seeds

Mix the vegetables together in a bowl. In a small bowl, combine the orange juice, soy sauce, rice wine vinegar, honey, ginger, lemon zest and black pepper. Add the dressing to the vegetables, toss together quickly. Use tongs to place the salad on a plate, and sprinkle sesame seeds on top. Enjoy!

Calories: 54 Carbs: 12g Fiber: 4g Fat: 0g Protein: 2g

Wednesday, October 6, 2010

Butternut Squash with Apples and Caramelized Onions

Fall is my favorite season. The smell of bonfires, the colorful leaves that fill the trees, hot apple cider and fuzzy sweaters. But most of all, Fall is my favorite season because the wonderful produce that is available. Parsnips, apples, sweet potatoes, pumpkins, and several varieties of squash- just to name a few. There's something so comforting, so rustic, about a warm vegetable dish on a cool fall evening.

I created this recipe last week, and have made it, tweaked it, and enjoyed it three times since. It really highlights the squash and apple's natural flavors, there's not much seasoning needed when the produce is at it's peak freshness. The onion and balsamic vinegar add a bit of sweetness, and the apples are perfectly crunchy. If you want to add a bit of creaminess, sprinkle a bit of feta on top, but I like to keep it simple. This is a great dish alongside a hot cup of tea. Enjoy!


Butternut Squash with Apples and Caramelized Onions
1 serving

1/2 small Butternut Squash (about 6 oz), 1/2 inch cubes
1 medium apple, medium dice
1/4 cup chopped onions
1 tablespoon Balsamic vinegar
2 Basil leaves
Dried thyme
Ground sage
Black pepper
Salt
Olive oil

1. Heat a saute pan over medium heat with just enough oil to coat the bottom. When the oil becomes shiny, add the onions. Cook until the onions have become browned and translucent. Remove them from the pan and set aside.

2. Add the butternut squash to the saute pan, add an ice cube and cover. Cook until slightly tender, or about 5 minutes, stirring often. Meanwhile, heat the balsamic vinegar in a small saucepan, and cook until reduced by half. Remove from heat.

3. When the squash is tender, add the apples, 1/4 teaspoon dried thyme, a pinch of ground sage, and salt and pepper to taste. When the apples are slightly tender, stir in the caramelized onions. Spoon onto a plate, and drizzle the balsamic reduction over top. Sprinkle shredded basil leaves on top, and serve. Enjoy!

Calories: 175 Fat: 1g Carbs: 45g Fiber: 10g Protein: 2g

Thursday, September 30, 2010

Lemon-Poppy Seed Cookies

Think of the last time you ate a 'healthy' cookie. It probably tasted something like cardboard, right? That's the problem for us health freaks-cuisine can easily be made healthier, but it gets complicated with baking. Baking is a science, so it's hard to swap out fattening ingredients with more nutritious ones- it completely changes the chemistry of the recipe! But with a little know-how, you can make a delicious, and nutritious cookie. I put my know-how to work with these Lemon-Poppy Seed Cookies. I saw the original recipe in Martha Stewart Living Magazine, and like a mad scientist set out to make a lower calorie, guilt-free version. I swapped oil with yogurt, sugar with Splenda, and white flour with whole wheat. Friends and family agree, this recipe is a keeper! Enjoy with a hot cup of tea!


Lemon-Poppy Seed Cookies
Adapted from http://www.marthastewart.com/recipe/lemon-poppy-seed-cookies-edf
Serves 26

1/2 cup whole wheat flour (spooned and leveled)
1/8 tsp table salt
1/4 tsp baking soda
1/4 cup Splenda
1/4 cup sugar
2 large egg yolks
2 tbsp poppy seeds
1 tbsp fat-free vanilla yogurt
1 packed tsp finely grated lemon zest
1 tsp lemon juice
seeds from 1/2 vanilla bean (or 1/2 tsp vanilla extract)

1. Preheat oven to 350.
2. In a medium bowl, combine flour, salt and baking soda.
3. In a small bowl mix together sugar, Splenda, egg yolks, poppy seeds, yogurt, lemon zest, lemon juice and vanilla seeds.
4. Stir mixture into flour until just combined.
5. Drop dough by teaspoons 2 inches apart onto a Silpat or parchment paper-lined cookie sheets. 6. Bake cookies 10-14 minutes, rotating 1/2 way through. Cookies should be lightly golden brown.
7. Transfer to wire racks and cool completely.
8. Store in an air-tight container.

Nutrition Facts
Calories: 23 Fat: .7 g Cholesterol: 15.5 g Sodium: 23.4 mg Carbohydrates: 4.3 g Fiber: .3 g Protein: .6 g

Friday, September 17, 2010

Dessert Centerpieces for the Women's Bible Study

Am I good at procrastinating or what? I have a good excuse though. I have been BUSY!

I have started Culinary School and I love it! I have already learned so much, and I am so excited about what I will learn in the future!

A lot of people from my church are really supportive of my passion for baking, and the ladies from the Women's Bible Study asked me to make dessert centerpieces for the bible study opening brunch! So for the past month and a half, my mom and I have been planning and shopping, and I have been perfecting the recipes for each dessert. The opening brunch was this past Tuesday, and it went great! There were (miraculously) no mess-ups or mishaps, and it went as smoothly as possible! I thought I would share some pictures with you all and see what you think! All the recipes are my own, except for the biscotti and apple dip. Everything else I created myself! If you would like any of the recipes, please comment and I'd be more than happy to share them with you.

Here I am working the night before. For three days I had been baking non-stop. Monday night I was up until 2am baking, then woke up at 6:30 to finish up! We had to be set up by 9am! My dog Buddy was a very helpful vacuum whenever I dropped anything.


Here is my favorite dessert. These are miniature chocolate cakes layered with espresso ganache and topped with buttercream frosting. I wanted them to look like little espressos with foam on top! I started by making chocolate cakes in 9 inch cake pans, and cutting out 2 small circles per cup. I filled the bottom of the cup with espresso ganache, put a cake circle, more ganache, another piece of cake, and finally piped the frosting on top.

The little espresso cake, up close. I sprinkled a bit of espresso powder on top.


Next are miniature no-bake cheesecakes. I didn't want them to be as dense as classic cheesecake, so I folded Cool-Whip into the cream cheese 'batter' to make them light and fluffy. I also added lemon zest, vanilla, and powdered sugar. The crust is a simple graham cracker crust, and there are three different toppings: Blueberry, raspberry, and strawberry. I made the sauces by pureeing the fruit, passing it through a fine sieve, and cooking the juice with sugar and cornstarch. A cheesecake close up!


These are one of my favorite creations, 'Dutch' Donuts. I used the same almond filling used to make the Dutch cookies 'Boterletters' or Dutch letters. I made a simple cake donut recipe and thickened it up with a bit of flour. Then I stuffed the dough with the almond filling and fried them, and sprinkled a bit of powdered sugar on top. I made a simple glazed of powdered sugar and milk to go on top.

Here is almond biscotti with a chocolate ganache and apple slices with a cream cheese and brown sugar dip.

There are two different kind of muffins here. Pumpkin and cranberry-apple. I also made a maple butter to go with them! Both are made with whole wheat flour and NO oil. I had to have SOMETHING healthy, right?! The maple butter was made by melting maple sugar and butter, then whipping it into room temperature butter.

Here's the last centerpiece. The top are my latest creations, Caramel Apple Tarts. I wanted to play off the Autumn theme and combine apple pie with caramel apples. The crust is a snickerdoodle cookie baked in a tart pan. The apple filling is basically an apple pie filling, only cooked over the stove, with lots of flour, brown sugar and apple cider. The bottom are mini pumpkin pies, my grandmas pie recipe just miniaturized!

Here they are after the centerpieces were moved to the desserts table. My wonderful mom made fruit spears, fruit cups, and mini cupcakes to look like sunflowers.


Here I am asleep after all the ladies left. The week had caught up to me!


This is a 'Thank You' gift the ladies made me. It is now hanging in my kitchen! The text on the apron says 'Taste and See That The Lord is Good.' Which was the theme for the brunch.


I had SO much fun doing this. It was a LOT of work, but very worth it, and great experience. Next up: Engagement desserts and wedding cupcakes!

Friday, July 16, 2010

Lamb Chops with Lemon Thyme Couscous and Cherry Plum Reduction

When I was a small child, I dreamed of becoming a clasically trained chef. But after watching countless reruns of Jacques Pepin, Emeril Lagasse and Julia Child, I learned that many, if not most dishes, are composed of hardly-healthy ingredients. The food tastes wonderfully, of course. But for the health conscious chef and diner, these delectable dishes are not generally an option. Luckily, you can cook equally delicious meals at home, minus the extra fat and calories. There’s no need to skimp on flavor and quality when you’re watching your weight, and you don’t need to cover your protein in butter or cream based sauces. With a little creativity, you can eat just as well as the Chefs of France, in your very own home.

My newest recipe is inspired by the concept of ‘High end-low calorie’ food. Lamb Chops with Lemon Thyme Cousous and a Cherry and Plum Reduction. The lamb chops are broiled instead of braised to cut back on fat. The couscous is whole wheat instead of nutritionally-deficient regular couscous, to offer more fiber and nutrients. The cherry and plum reduction is made of just three ingredients, and is sweetened and thickened by the fruits’ natural sugars. The lamb is rich and perfectly seasoned, the couscous is light and fragrant, and the Cherry-Plum reduction is a touch tart balanced with natural sweetness. Homemade, healthy food that you would expect to find on a pricey restaurant menu. Top Chef here I come!


Lamb Chops with Lemon-Thyme Couscous and Cherry-Plum Reduction

2 Small lamb Chops (With bone, about ½ pound)
1/3 cup Whole Wheat dry couscous
1/3 cup reduced-sodium, fat free chicken broth
8 bing cherries, pitted, quartered
1 plum, chopped into ¼ inch pieces
½ tablespoon balsamic vinegar
1 medium clove garlic, minced
Thyme
1 lemon
Black pepper
Salt
Cooking spray (or olive oil spray)

1. Season the lamb chops generously with salt, pepper and thyme. Set aside.
2. In a small sauce pan, heat a small spritz of cooking spray over low heat. Cook garlic until slightly tender and translucent, about 2 minutes. Add chicken broth, black pepper to taste, and about 1/4 teaspoon dried thyme. Bring to a boil, stir in couscous, a squeeze of lemon juice, and about 1/2 teaspoon lemon zest. Remove from heat, cover and set aside.
3. In a separate small sauce pan, cook the chopped plum over low heat. Use a fork or potato masher to slightly mash the plum. Cook for about 4 minutes, or until the plum juice starts to thicken. Stir in the cherries and continue to cook over low heat.
4. Meanwhile, heat the broiler on medium, or about 500 degrees. Place the lamb in a lightly greased, oven safe skillet, and cook for a total of 12 minutes, turning halfway through.
5. Finally, add a pinch of black pepper and balsamic vinegar to the fruit reduction, and cook until reduced to a thick sauce.
6. Let lamb rest for 2-3 minutes before plating. Plate couscous first in a small mound and spoon the cherry-plum reduction on the rest of the plate. Place lamb chops on top of sauce, leaned against couscous. Enjoy!

Nutrition: Calories: 425 Fat: 8.6 g Cholesterol: 85.1 mg Sodium: 405.3 mg Carbs: 54.9 g Fiber: 3.9 g Protein: 34.4 g