Saturday, January 29, 2011

Recipes for Hair, Face and Body

Americans have become obsessed with what we put in our bodies. Organic food sales rise every year, and many families have made the choice to buy food products free of pesticides, antibiotics, preservatives and other chemicals. Our country spends millions of dollars every year on diets, detoxes and supplements and smoking is taboo. If we're so conscientious about what we put in our bodies, why aren't we more concerned about what we put on our bodies. If you use body lotion, you know that it doesn't just sit on top of your skin. Instead, it gets absorbed, much like how our bodies absorb nutrients from foods we eat. There's a rule of thumb that if you can't pronounce it, don't eat it. This should ring true for hair, face and body products as well. Methylchloroisothiazolinone (also used in glues and fuel products), Benzophenone, Disodium lauroamphodiacetate? These are just a few ingredients listed in common body and face washes, and unless you have a Bachelor's degree in English, I doubt these are easily pronounced. Instead of just nourishing our bodies from the inside out, let's start nourishing from the outside in as well.

I've been a fan of making my own body products since I was a little girl. My mom never knew if the concoctions in the fridge were for eating or for my face! While my friends were buying expensive hair treatments, I was slathering my locks with mayonnaise. When my friends were buying ten different bottles of acne wash, I was spreading honey on my face.
I've done extensive research on the benefits of natural foods on hair, face and body, and have written several recipes that I would use over store-bought products any day. Not only are homemade body products much healthier than store bought products, but much cheaper as well. Below are a few of my favorite beauty recipes, as well as a list of ingredients and their benefits. Feel free to use my recipes as a guide and mix and match to create your very own body products.

Feed your skin!
  • Honey: Antiseptic, contains antioxidants
  • Olive Oil: Moisturizer, contains antioxidants
  • Sugar: Exfoliant
  • Coffee Grounds: Exfoliant, caffeine which tightens skin, stimulates blood flow
  • Coconut: Antiseptic, moisturizer, contains antioxidants
  • Almonds: Exfoliant, contains Vitamin E, contains antioxidants
  • Green and Black Tea: Contains antioxidants, antibacterial properties, anti-inflammatory
  • Oranges: Contains Alpha Hydroxy Acids which sloughs off dead skin cells and promotes growth of new skin cells, contains antioxidants, anti-inflammatory

Remember, these recipes include perishable ingredients and should be used immediately or refrigerated in an air-tight container for up to 5 days.

Bring your scrubs, masks, moisturizers and rinses into the shower in an air-tight container to avoid getting them wet. You should always shave before using a body scrub, so your skin can get fully exfoliated.

Tropical Body Scrub

Makes enough for one treatment

This is a great exfoliating scrub with orange juice and lemon juice to slough off dry skin.

  • 3/4 cup granulated sugar
  • 1/4 cup brown sugar
  • 1/4 cup shredded coconut
  • 1 tablespoon honey
  • 3/4 teaspoon grated ginger root
  • 1 teaspoon grated orange zest
  • 2 tablespoons orange juice
  • 1 teaspoon lemon juice

Combine sugars, coconut, ginger and orange zest. Stir in honey, then lemon and orange juice. Shower as usual, then turn the shower head so you are not in the water. Rub the scrub over your entire body in circular motions (to stimulate blood flow), applying light pressure, for five minutes. Do not use this scrub on your face. If possible, wait an additional five minutes before rinsing. Rinse with warm water. Once dry, follow with an all-natural body lotion.

Wake-Up Exfoliating Scrub

Makes enough for one treatment

This scrub is a great way to start the morning. The caffeine from the coffee grounds stimulate blood flow and tighten skin, and the acidity from the orange juice leaves your skin feeling clean and silky.

  • 1/4 cup brewed coffee grounds
  • 1/2 cup granulated sugar
  • 1/4 cup almonds, ground
  • 3 tablespoons raw cane sugar (brown sugar if you don't have cane)
  • 2 black tea bags
  • 2 tablespoon orange juice

Combine coffee grounds, sugars, almonds and contents of the tea bags. Stir in orange juice. Shower as usual, then turn the shower head so you are not in the water. Gently massage the scrub over your entire body for about 5 minutes. Do not use on your face. If possible, wait an additional 5 minutes before rinsing. Follow with an all-natural body lotion.

Moisturizing Shower Cream

Makes enough for one treatment

Start moisturizing before you step out of the shower. This creamy mixture is perfect after using a body scrub. It's filled with antioxidants and moisturizing ingredients to leave your skin feeling hydrated and silky smooth.

  • 1 cup water
  • 2 green tea bags
  • 1/3 cup old fashioned oats3 tablespoons honey
  • 2 tablespoons olive oil
  • 1/4 teaspoon grated orange zest
  • 1/4 teaspoon almond extract

Microwave 1 cup of water for 1 minute, or until hot. Steep two green tea bags for 5 minutes. In a bowl, combine 1/4 cup plus 1 tablespoon brewed tea and oats. Add honey, olive oil, orange zest and almond extract. Mix together until the mixture is completely combined. Shower as usual, use a body scrub if desired and rinse. Turn the shower head so you are not in the water. Slowly massage the moisturizer over your entire body. Let the moisturizer soak in for a least 5 minutes, the longer the better. Rinse.

Strawberry Fields Face Scrub

Makes enough for 2-3 treatments

This scrub gently sloughs off dead skin cells from your face, while nourishing your skin with anti-oxidant-filled strawberries and honey.

  • 1/2 cup old-fashioned oats, slightly ground
  • 5 small strawberries, well mashed or slightly pureed, about 1/4 cup (frozen strawberries work just as well, just defrost and proceed)
  • 2 tablespoons superfine granulated sugar (If you don't have this on hand, toss regular sugar into a food processor and pulse a few times)
  • 5 almonds, finely ground
  • 1 tablespoon honey
  • 1 tablespoon milk

Combine oats and strawberries. Stir in honey and milk, then sugar and almonds. Moisten face, gently massage face with about a tablespoon of scrub. Let the scrub sit for up to 10 minutes, the rinse with warm water and pat dry.

Tightening Face Mask

Makes enough for several treatments

The ginger and orange zest in this mask act as gentle astringents, while the egg whites tighten the skin.

  • 2 egg whites
  • 1 tablespoon milk
  • Pinch grated ginger root
  • 1/4 teaspoon grated orange zest

In a bowl, whip egg whites, milk, ginger and orange zest until frothy. Wash your face as normal and pat dry. Use your fingers to apply a light coating of the mask all over your face, avoiding your eyes. Let the mask dry for up to 15 minutes, then rinse with warm water and pat dry.

Conditioning Hair Mask

Makes enough for 2-3 treatments

This hair mask nourishes your hair with antioxidants and vitamins, and leaves your hair incredibly soft and shiny.

  • 1/4 cup plain or vanilla yogurt
  • 1/4 cup pureed pumpkin
  • 1 tablespoon olive oil
  • 1 tablespoon milk
  • 1 tablespoon coconut powder (If coconut powder is not readily available, use 1/2 tablespoon coconut milk instead)
  • 1 teaspoon honey
  • 1/2 teaspoon vanilla extract

In a bowl, combine yogurt, pumpkin and olive oil until the oil is fully incorporated. Stir in milk, coconut powder, honey and vanilla. Wash hair as normal, do not condition. Squeeze water out of hair, and coat hair with about 1 tablespoon (2 if your hair is very long or thick) of mask, starting from the bottom and working your way up. Let the mask sit for 5 minutes before rinsing. To deep condition your hair, coat your hair with 2 tablespoons of mask. Wrap your hair with plastic wrap, and then wrap a hair towel over the plastic wrap. Let the mask condition your hair for up to an hour before rinsing well with warm water.

Shiny Hair Rinse

Makes enough for one treatment

This rinse protects your hair with antioxidants and makes it incredibly shiny.

  • 2 cups water
  • 2 green tea bags
  • 2 black tea bags
  • 1 tablespoon orange juice
  • 1/4 teaspoon vanilla extract

Microwave two cups of water in separate cups, for 1 minute. Place green tea bags in one cup and black tea bags in the other cup. Steep for 5 minutes. Measure out 1/2 cup green tea, combine with 1 cup of black tea, orange juice and vanilla extract. Wash hair as usual. Right before getting out of the shower, squeeze the water out of your hair. Pour the rinse evenly over your hair. Let the rinse soak into your hair for a few minutes, then squeeze out your hair. Do not rinse.

Friday, January 28, 2011

Healthy Cornbread

There's a joke around here that if you want a big butt, you just have to eat cornbread. It came about because it's a staple comfort food here in the Midwest, and we all know mid-westerners are not known for our beach bodies. But it's popular for good reason. Nothing goes better with a bowl of chili than a steaming slice of fresh cornbread, honey shimmering as it slides it's way down the sides, and butter melting and soaking into every golden crumb. I can taste it now!

Luckily, with this recipe, we health freaks can have our cornbread, and eat it too! The recipe that my family has used for years is from the 'Colorado Cache Cookbook,' and although it's delicious, it definitely won't help shrink your waistline. I replaced the butter with real corn, used whole wheat flour instead of white, cut the sugar by 1/4 cup and used egg whites in place of one egg yolk. And the best part? 1 piece is only 130 calories! But, you're going to have to try for yourself!


Healthy Cornbread
16 servings

1 cup pureed corn kernels + 1/4 cup whole kernels
1 tablespoon vinegar or lemon juice
1 cup minus 1 tablespoon skim milk
1 3/4 cup cornmeal
3/4 c whole wheat flour
1/2 cup sugar
1/2 teaspoon salt
1 egg
2 egg whites
1 1/4 teaspoon baking soda
1 tablespoon unsweetened applesauce
1 tablespoon light sour cream
2 tablespoons honey


Pour vinegar into measuring cup, add milk and set aside. In a large mixing bowl combine cornmeal, flour, sugar and salt. Make a well in the center and pour in egg, egg white, pureed corn, apple sauce, sour cream and honey. Add baking soda to milk, stir and add the mixture to the bowl. Mix well. Stir in 1/4 cup corn kernels. Pour into greased 8x9 baking pan. Bake at 375 degrees, about 30-35 minutes, until a toothpick inserted in the center comes out clean. Serve warm.

Click below to enlarge nutrition facts


Corn Bread on FoodistaCorn Bread

Tuesday, January 25, 2011

Winter Root Soup


Winter break is over and classes have resumed. I am so incredibly blessed that I get to take classes that teach me everything I could ever want to learn about my life passion: Food. Nutrition, Hospitality Supervision, and Culinary Principles II - I get to learn all aspects of the field, and I enjoy every minute of it! For my first class of Culinary Principles II, we started with what my instructor likes to call 'Scratch and Sniff', although there's no scratching involved. He sets out a tray of herbs and spices, all numbered, and we guess which each is. This time, he also included uncommon vegetables. Parsnips, purple fingerling potatoes and celery root. I had never worked with nor tasted celery root, so I asked him to tell me about it as well as how to cook it.

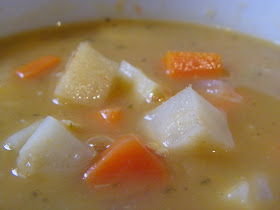
Inspired, that night I went to the grocery store and bought all the ingredients I would need for a 'Root' soup. I started with a mirepoix, which is 2:1:1 of onion, celery and carrots, respectively. I chopped several carrots, parsnips, potatoes and celery root, and saved the trimmings. I added about a gallon of water to the mirepoix, and the trimmings of the vegetables. This boiled for 2, nearly 3 hours, until all the flavor of the vegetables has been dispersed through the water. Next, I roasted the chopped vegetables for just 6 minutes, to impart more flavor. Then, I drained the broth and reserved the liquid and the vegetables. Using the same pot, I again started a mirepoix, then added the broth, along with the slightly roasted vegetables and spices. Finally, I pureed 2/3 of the vegetables used for the broth, and added them to the soup, giving a velvety contrast to the slightly crunchy vegetables.

This soup is the best soup I've ever made, hand down. Using both dried and fresh herbs adds both a light and a 'wintery' flavor to the broth. This is a wonderful soup for a bone-chilling, blistery winter night. Roots are sometimes viewed as peasant food, and this soup has a rustic feel, but it is also refined: the extra steps such as making the broth from scratch and roasting the vegetables, adds layer after layer of complex flavors.

Next time you're feeling under the weather, this soup is the perfect sick-day lunch. Freeze it in plastic containers to heat up for a quick meal. Refrigerate the soup for up to one week.

Winter Root Soup

Makes 9 - 1.5 cup servings

1 2lb bag large carrots, medium dice to make 1 3/4 cups, save scraps
5 parsnips, medium dice, save scraps
1 celery root, medium dice, throw away outside, save unused flesh,
2 1/2 cups onion, medium dice
1 bag celery, medium dice to make 1 1/4 cups, save scraps and extra stalks
3 medium potatoes
4 quarts water
1/4 cup white wine
1 large clove garlic clove, minced
1 tablespoon fresh minced rosemary
2 leaves fresh basil
Dried thyme
Dried oregano
Olive oil
Sea salt
Black Pepper

In a medium stock pot (6 quarts), heat 1/2 tablespoon olive oil over medium-low heat. Add 1 1/2 cups onion, cook for two minutes, stirring frequently. Add 3/4 cup carrots and 3/4 cup celery, cook for about 5 minutes, or until the vegetables are tender and the onions translucent. Add the carrot scraps, parsnip scraps, unused flesh of celery root and the tops, bottoms and extra celery stalks. Cook for two minutes, and add four quarts of water. Cover, and boil over medium-high heat for 2-3 hours. The longer the better!


In a large bowl combine 1/2 cup carrots, celery root, parsnips and potatoes. Toss with a drizzle of olive oil, 1 teaspoon salt and 1/2 teaspoon ground black pepper. Spread onto a foil-covered cookie sheet, roast at 400 for 6 minutes. Remove from oven and set aside. When the broth has cooked for 2-3 hours, strain the vegetables, reserving the broth and vegetables. Return the pot to the stove.


Heat 1/2 tablespoon olive oil over low heat and add onion. Cook 3 minutes, stirring frequently. Add carrots and celery, and cook 5-6 minutes, or until the onions start to brown. Add minced garlic and rosemary and cook another minute, stirring constantly. Deglaze the pot with 1/4 cup white wine, using a wooden spoon to scrape any brown bits off the bottom. Next, slowly pour in the reserved broth, and turn heat to medium-high. Bring to a simmer and cook for 2 minutes.

Add the roasted vegetables and 1 1/2 teaspoons dried thyme and 1/2 teaspoon dried oregano. Cover, and simmer for about 5 minutes. In a food processor or blender, puree 2/3 reserved vegetables from the broth with 2 leaves fresh basil. The vegetables should be very smooth. Add to the stock pot, and stir. Season with salt and pepper to taste, about 1 1/2 teaspoons and 3/4 teaspoon, respectively. Simmer another 3-6 minutes, or until the vegetables are tender, but not overcooked, Al Dente, if you will. Serve in warm bowls with a teaspoon of cream swirled on top and a fresh basil leaf. Enjoy!

Click below to enlarge nutrition facts

Sunday, January 23, 2011

Pizza Pinwheels


I'll be the first to admit it: I know nothing about football. I don't like the sport, and I don't watch it often. When I do watch it, I'm a Packers fan, but honestly, I could care less. Hence why I'm writing this instead of watching the Bears - Packers game at my sister-in-law's house. I did, however, make some appetizers for their little get together, and I think they make the perfect Game Day finger food.


I came across a recipe for Pizza Pinwheels written by Pillsbury. The recipe called for Parmesan cheese and the pinwheels didn't have sauce on the inside, only as a dipping sauce. What's the point of calling it a pizza pinwheel if the sauce is on the outside? Isn't that called a mozzarella stick? So I created these using sauce, herbs, pepperoni and mozzarella cheese all wrapped up in a buttery, golden crescent crust. They're quick and cheap to make, and perfect size for the guys or the kids!


Start by cutting the dough into four even rectangles

and brushing the dough with a light coating of sauce

Sprinkle fresh basil evenly across the dough


Place several pieces of pepperoni
on each rectangle

Drizzle more sauce over top the basil and pepperoni, and cover with cheese

Tightly roll each rectangle starting at the short side


Slice, and top with melted butter

Place on a cookie sheet 2 inches apart

Bake until golden brown


Pizza Pinwheels

Makes about 40

2 cans of seamless crescent dough
1 8oz can tomato sauce
1 clove garlic, minced
1 bag shredded mozzarella cheese (about 1 1/2 cups)
24 slices pepperoni (optional)
2 tablespoons butter
Fresh basil
Dried oregano
Black pepper
Salt

Preheat oven to 350. Grease 2 large cookie sheets or line with non-stick foil.
In a small sauce pan, combine tomato sauce, garlic, 1/8 teaspoon black pepper, 1/4 teaspoon dried oregano and salt to taste. Simmer over low heat until reduced by about half. Remove from heat and set aside. Unroll both cans of crescent dough, and cut each into 4 even rectangles. (I like to roll them out on a Silpat so they don't stick to the counter).

Coat the dough with a thin layer of tomato sauce. Tear small pieces of basil and sprinkle over each rectangle. Chop the pepperoni into small squares and spread them evenly across the dough. Drizzle the remaining tomato sauce over the basil and pepperoni. Sprinkle the cheese on top of the dough, careful not to let it hang over the sides. Starting from the short end, tightly roll the dough into a log, seam side down. Press in the sides to keep the filling intact. Using a very sharp unserrated knife, slice 5-6 pinwheels per log. Place each piece on a cookie sheet, 2 inches apart. Very lightly press the pinwheels to flatten the tops.

Melt 2 tablespoons of butter and stir in a large pinch each of black pepper, salt and oregano. Use a brush and dab the melted butter on to each pinwheel. Bake for 13-15 minutes until the crescent is lightly browned and slightly crisp. Let them cool for 5 minutes and remove from the cookie sheets. Serve warm. Enjoy!

Monday, January 17, 2011

No-Bake Shot Glass Cheesecakes

I made up the recipe for these little cheesecakes for my first catering job. My church held a Women's brunch and asked me to make 6 centerpieces with small desserts. The cheesecakes were the favorite among the women and have been a staple dessert for all my catering events. I love them for three reasons. First, they just looks so cute. Second, they're the perfect size if you just want a taste, not a whole slice of cheesecake (See? It's healthy...ish...) And finally, everything is better in a shot glass.

I've made these cheesecakes several times, and I think I've finally perfected it. At least that's what my taste testers (mom and boyfriend) said. This time around I used Mascarpone cheese in place of one brick of cream cheese and the final dessert was lighter and less tangy than the original recipe. It's a keeper!

These are really easy and fun to make, and they're always the talk of the party. They're great for birthday parties, socials, and dinner parties. You can experiment with different toppings or mix fresh fruit into the cheesecake itself...Or better yet, let your guests top their glasses with their choice of topping. Shot glasses can get expensive. If you want to keep it budget-friendly and easy to clean up, buy a pack of plastic shot glasses. I like to use candle votives instead of actual shot glasses. I find that they're a bit larger, and you can buy a whole case of them for much less than shot glasses.

Happy Baking!


Mix the cheesecake 'batter' and the graham cracker crust.

These votives came packaged in a plastic tray that holds each glass and a similar tray that fits over top. They then slide into a plastic box. I kept the packaging to hold them while I fill them and transport them.
Use a tablespoon to measure out the crust (or if you're a gadget lover like me, #70 scoop) and fill each shot glass.

Press the crust into the bottom of the glass, I like to use a tart press. Don't pack it too tight. Just enough to hold it's shape.

The crust should be about 1/2 inch high


Here's a trick of the trade: Place your pastry bag in a tall drinking glass, fold down the top of the bag over the sides of the glass and fill with the batter.


Pull the top up of the bag, twist to close and cut the tip


Pipe the batter with one lifting motion


And smooth the top of each cheesecake with a small spatula


Top with your choice of fruit preserves, ice cream topping, jams or fresh fruit.

No-Bake Shot Glass Cheesecakes
Yields about 20

Cheesecake
16 ounces cream cheese, slightly softened
8 ounces Mascarpone cheese, slightly softened
3 cups Cool-Whip
1 1/2 cups confectioner's sugar
1/2 cup milk
2 tablespoons vanilla extract
1 teaspoon lemon juice
1/2 teaspoon lemon zest

Crust
1 3/4 cup graham cracker crumbs
7 tablespoons butter, melted
1/4 cup granulated sugar

Topping
2 jars of any fruit ice cream topping, jam, or preserves

In a medium bowl, combine graham cracker crumbs, melted butter and sugar. The crumbs should be moist, but not wet, and should hold together when pressed in place. Set aside.

Using an electric mixer, cream together cream cheese, Mascarpone cheese, vanilla, lemon juice and lemon zest. Beat in 3/4 cup confectioner's sugar. Slowly mix in the Cool-Whip, and then remaining 3/4 cup confectioner's sugar. Slowly mix in enough milk to make the batter the consistency of a fluffy frosting.

Spoon the cheesecake batter into a piping bag. Cut the tip where the bags width is about 3/4 inch.
Drop 1 tablespoon of graham cracker crust into each shot glass and press down with the tablespoon or something flat. (I used a tart press) Place the tip of the pastry bag into each shot glass, squeeze and fill the glass with one lifting motion (this ensures the glass fills evenly), leaving 3/4 inch at the top unfilled. Use the back of the spoon or a small spatula to smooth the top of the cheesecake. Finally, spoon the fruit topping over the cheesecake, almost to the rim of the glass. Wipe off the edges with a damp cloth. Keep refrigerated.

Wednesday, January 12, 2011

Kitchen Sink Cookie Bars

It started with boredom. My boyfriend Zach and I had nothing to do. We threw a few ideas around. We are both culinary students, but he's the cook, I'm the baker, though we're always eager to learn new techniques from each other. Finally, we decided to make cookies. Chocolate chip cookies. One GIANT cookie. But then we thought, 'What if we add peanut butter? And peanut butter chips? And...' the list went on and on. We made them and they were delicious! But we decided to make them again and tweak the recipe.

So like mad scientists, we experimented and came up with what we think is an AWESOME cookie bar recipe. Seriously, SO good. They're chewy, but still a bit crispy on the outside. With every bite, you get peanut butter, chocolate and white chocolate, and just a little crunch of pecan. But one warning before you make them- They have a tendency to disappear very quickly!

This recipe is very flexible and holds up well to additions of new ingredients. Our first batch we used chocolate and peanut butter chips, and no white chips, and added coconut and oatmeal. You could try adding toffee chips, dried cranberries, peanuts, anything you can find in your pantry! We photographed the first batch, hence the mini chocolate chips and missing white chocolate chips!


It's easiest to fold in the chips and nuts by hand, so they're evenly distributed.

Your hands are the best tools!

With the topping (it dries but doesn't harden, it's perfect!)


Without the topping..And the best part about baking?

Sharing is caring. These went to my boss!

Kitchen Sink Cookie Bars

1 1/2 cup Crisco (3/4 cup each Butter Crisco and Plain Crisco)
3/4 cup granulated sugar
1 1/2 cup brown sugar, packed
2 teaspoons vanilla extract
3 eggs
1/3 cup peanut butter
1/4 cup brewed coffee
4 cups flour
1 1/2 teaspoons salt
1 1/2 teaspoons baking soda
2 tablespoons cocoa powder
1/8 teaspoon espresso powder
6 oz peanut butter chips
6 oz chocolate chips
6 oz white chocolate chips
1/2 cup finely chopped pecans
Topping (optional)
1/2 cup each chocolate and peanut butter chips
2 tablespoons butter
heavy cream
Preheat oven to 375. Cover a sheet pan with non-stick foil.

Cream together Crisco, brown and granulated sugars, and vanilla. Microwave the peanut butter for 20 seconds, or until softened. Mix in the eggs, peanut butter and coffee. Combine flour, salt, cocoa powder and espresso powder and slowly mix in. Finally, fold in 6 oz of chocolate chips, 6 oz peanut butter chips, 6 oz of white chocolate chips, and pecans.

Using your hands, evenly spread the dough on the sheet pan. Bake for 20-25 minutes, or until the edges are slighty browned, and a toothpick inserted in the center is removed clean. Let cool, and remove from pan by lifting the foil.

For the topping, use a double boiler to melt 1/2 cup chocolate chips and 1/2 cup peanut butter chips. Stir in 2 tablespoons of butter and enough heavy cream to make a smooth sauce, about 2 tablespoons. Remove from heat and let cool. Spoon into a pastry bag, and drizzle on top of the bars (or at this point- GIANT cookie). Let the topping set, and cut into bars using a pizza cutter. Store the bars in a covered container.

Sunday, January 2, 2011

7 Habits of Highly Effective Chefs

7 Habits of Highly Effective Chefs

1. Organization

A good cook is an organized cook.

The kitchen is the cook’s office. You cannot work effectively and efficiently in an office if there are papers scattered all over the place. And you cannot cook in a disorganized kitchen. To start, keep frequently-used appliances and tools in easy-to- access locations. I keep my wooden spoons, spatulas, and ladles in a tall wooden container next to the stove. The food processor and digital scale are kept in the breadbox, the Kitchen Aid and toaster are kept on top of the counter. Appliances which are only used a couple times a month are kept in separate storage cupboards. I find it’s easiest to keep alike appliances and gadgets in their own cupboards and drawers. For example, I have a drawer especially for measuring cups and measuring spoons, scraping spatulas, and other small gadgets like a citrus peeler and apple corer. In my silverware drawer, I keep small knives, tea spoons, serving spoons, and vegetable peelers. Next to the stove is a drawer with tongs, meat cleaver, large knives, thermometers and basters.

We keep a full set of cupboards especially for appliances that we don’t use on a daily basis: The salad shooter, mandolin, cheese graters, juicer and citrus juicer. Then comes pans. We have a cupboard with two pull-out drawers. The top one is for sauce pans and stock pots, the top is for sauté pans and griddles. Finally, serving bowls, flatware, Tupperware, baking pans and cookie sheets all have their own drawers or cupboards.

Recipes and cookbooks should have their own place in the kitchen and should be categorized. If you take the time to organize your recipes into categories (breads, meats, pasta, etc) you’ll thank yourself later!

2. Planning and Preparedness

Have you ever tried to make a meal, while preparing the ingredients at the same time? More often than not, something gets over -cooked, or finished too quickly and is cold by the time the meal is served. Most definitely the cook becomes rushed. A common term in the culinary world is mise en place, which literally means ‘everything in place.’ This term is used to describe the preparation of ingredients and equipment before the cooking process is started. This is where a great set of prep bowls comes in handy.
Basic mise en place
• Preheat oven and set out butter or other ingredients which need to be room temperature
• Marinate or season your proteins
• Ingredients should be washed, peeled or trimmed if necessary
• Dry ingredients should be measured accurately and set aside
• Chop, mince, dice, slice ingredients, measure and set aside in separate bowls
• Ingredients needing refrigeration should be measured last, and refrigerated until use
• Clean and set up any appliances you will need
• If you are not using the ingredients right away, cover them with plastic wrap and refrigerate
Once you have all your ingredients prepared, measured and placed into bowls, put them near your workspace for easy access. I like to place all my bowls on a cookie sheet so I can move them easily from one place to another. Now you are ready to prepare your meal, with all your ingredients prepped and set up near by.

Another idea I find useful is to place my recipes in page protectors. This way they’re free from drips and spills, and you can handle them with messy hands.
Along with mise en place, comes timing. Timing is everything and definitely a learned skill. Knowing how long to marinate a steak, how long to cook potatoes or how long to blanch your vegetables can make or break a meal. But it comes with practice and experience.

3. Creativity/ experimentation

Cooking and baking is not just a skill, it is an art. It is an opportunity to unleash your creativity and passion for food. It’s a chance to color outside the lines and break the rules. I’m not opposed to recipes completely, but I do want to stress the importance of tweaking the recipe to make it your own. Anyone who can read can follow a recipe, but by adding or substituting an ingredient here or there, you can turn any dish into your very own. Experimenting is everything. Try new herbs, spices and flavorings to find what works together and what does not. Combine different sauces or dressings to make a dipping sauce, or try marinating proteins with different beverages you have on hand. A wonderful way to create new dishes is to combine different types of cuisines. Italian-Korean? Mexican-Chinese? You never know what combinations may turn out delicious!

Creativity does not just pertain to flavors. You eat with your eyes first! Try using vibrant colors in your dishes, interesting serving platters, and festive garnishes. Take pride in your presentation. A plate of food can truly become a work of art!

4. Safety/cleanliness

This should be a no-brainer. The kitchen can be a dangerous place! Accidents like burns, spills, slips and fires are a very serious concern. The kitchen is also a breeding ground for bacteria, or in other words, food poisoning! Luckily, a bit of common sense can help you avoid these incidents altogether. A few things to keep in mind:
• Clean as you go
• Wipe up spills immediately
• Alert anyone in the kitchen when walking behind them, especially while handling hot items
• Cook items to their proper temperatures before serving (following temperatures are Fahrenheit)
Steaks and Roasts- 145
Fish- 145
Pork- 160
Ground Beef-160
Egg Dishes-160
Chicken Breasts-165
Whole Poultry-165

• Beware of the Danger Zone (40 degrees to 140 degrees) the range in temperature which bacteria thrive and multiply. Keep cold foods cold, hot foods hot
• Keep separate cutting boards for proteins and produce
• Always use correct appliances and tools for the job
• Always wash your hands with anti-bacterial soap after handling raw meat, and wipe up and drippings with sanitizing spray
• Wash and sanitize all utensils and dishes properly

5. Simplicity

K.I.S.S.
Keep it simple, stupid. Okay, it may be a little harsh. But where has the simplicity of our food gone? Must everything be so complicated? Go to any modern restaurant in any big city, and you’ll see what I mean. Mousse of Something-I’ve-Never-Heard-Of. Essence of This- That- Or- The- Other -Thing. Stuffed-Animal-With-Imported-Whatnot. You get the point. I’m not saying that experimenting with new and funky foods and techniques is a bad thing. But avoid mucking up the flavors of your dish. Season with only the seasonings you need for your dish to be successful. Stay true to the natural flavor of the food you are working with. Pair with complimentary sides. It’s simple: Keep it Simple.

6. Proper equipment and ingredients

As chefs, we cannot produce quality food without tools and ingredients. Let’s first talk about equipment.
Buying quality equipment does not mean you must by the most expensive products on the market. Instead, it should be adequate for the job it will perform, durable, and easy to clean. You should also look for products that can perform several tasks, such as a food processor or a mandolin with different blades. Chefs who use their appliances often should consider these purchases investments. For example, you may buy a quality set of sauce and sauté pans for several hundred dollars, but they will last you many years. Same goes for cutlery. A nice set of knives usually costs upwards of $200, but will be worth the money in the long run. Invest now, save later.

You should also use quality ingredients in your cooking. Again, this does not mean you must buy the most expensive ingredients in the grocery store. Instead, you should buy ingredients that are adequate for the jobs they will perform. For example, say you’re baking chocolate chip cookies. It is not necessary to spend several extra dollars on Ghirardelli chocolate chips when Nestle chocolate chips will produce just as tasty cookies. There’s no reason to buy foreign herbs and spices when you can get the same product in your local store for much cheaper. The organic issue is a whole other story, but many people consider organic produce much more flavorful than conventionally grown food. If you agree, you may want to spend the extra money on organic food if you believe it will enhance the quality of your dish.

Quality products and ingredients equal quality food.

7. Willingness to learn

The two biggest disadvantages chef can have are a closed mind and an ego.
A chef must always be willing to learn. Like any trade, any art, there is always something to learn. The culinary world is advancing quickly. There are always new chefs to learn from, everyone has something different to offer. Keep your mind open to new techniques, new cooking methods, new equipment and new trends. A closed mind and an ego go hand in hand. As do willingness to learn and humbleness. You must remember that there are chefs who are more experienced than you. Chefs who are more recognized and more creative than you. Do not be bitter. Instead, learn from these people to better yourself. Keep an open mind and learn as much as you can.