Tuesday, December 28, 2010

Cranberry-Chai Bread

It's been a month since I've updated. The holidays have come and (almost) gone, and I've finally found some time to just sit and write. I am currently at my cabin in northern Wisconsin with my family and boyfriend. All the ground and trees are frosted white, the lake is completely frozen, and the only sign of life is the deer tracks going this way and that. I love it here, it's beautiful, quiet and peaceful- a perfect getaway to write.

I've been wanting to make Chai bread for quite some time. But with a long holiday to-do-list, I kept putting it off. The kitchen was filled with Christmas cookies of all sorts, and even when I had the time to make it, I hardly had the space. Finally, one day last week, I set out to make the bread. It had been hanging over my head long enough, and I couldn't put it off any longer. Now, when it comes to breads, I have a basic recipe which I tweak depending on the kind of bread I want to make. This recipe I developed using applesauce or pumpkin instead of oil. But I didn't want my Chai bread to have either of those flavors. I wanted it to be just Chai- nothing else. So I looked through my very-worn Better Homes and Garden's cookbook, to find a recipe I could tweak. I finally settled on Cranberry Orange Bread. It was very basic and looked easy enough to change the flavors.


I immediately started to mix things together. After I had mixed up all the ingredients, I realized that there was hardly any batter. I read through the recipe again, this time more carefully, and realized that it called for a whole cup of cranberries. No wonder there was hardly any batter! I decided that I would add the cranberries, and hope the Chai-Cranberry combination would turn out in my favor. It sure did! I could hardly wait to try it out once it came out of the oven. It's the perfect cold-weather snack. Warm, sweet, earthy and just a bit tart. The combination of the different flavors couldn't have blended any better! And with a smear of butter, it's just heavenly!


Cranberry-Chai Bread
Makes 10 slices

2 cups Whole Wheat Flour
1/2 cup granulated sugar
1/4 cup granulated Splenda
1 1/2 teaspoon baking powder
1 teaspoon salt
1 teaspoon cardamom
1/2 teaspoon cinnamon
1/8 teaspoon ground cloves
1/8 teaspoon ground ginger
1 chai tea bag
1 egg, beaten
1/2 teaspoon finely grated orange peel
1 teaspoon vanilla
3/4 cup brewed black tea
2 tablespoons applesauce
1 cup chopped cranberries (I used frozen cranberries, chopped them with the food processor, and measured 1 cup)


1.
Sift together flour, sugar, Splenda, baking powder, salt, cardamom, cinnamon, cloves, ginger and the contents of the chai tea bag.

2. In a separate bowl, whisk together the egg, orange peel, vanilla, tea and applesauce. Stir into the flour mixture until just moistened.


3. Fold in chopped cranberries


4. Pour into a greased 9x5x3 loaf pan, and bake at 350 for 60 minutes.


5. Remove from the pan, and cool on a rack.

Enjoy warm, with honey or butter.
Wrap in plastic wrap and store in the fridge.


Nutrition Facts per slice
Calories: 136 Fat: 1 g Saturated Fat: .2 g Cholesterol: 21.3 mg Sodium: 312.4 mg Potassium: 22.5 mg Carbohydrates: 31.1 g Fiber: 3.7 g Sugars: 12 g Protein: 3.9 g

Wednesday, November 24, 2010

Keaton's Limerick Ham

When I'm asked about my heritage, I reply that I am a mutt. I'm a little bit of everything: German, Irish, English, Dutch, and Welsh. I've always envied my friends who are 100% or 50% one thing or another. They have interesting traditions, languages and traditional food. None of my immediate grandparents are from other countries, and I've never visited any of my ancestors' home countries. Growing up, and even now, I have a hard time knowing which ethnicity to associate myself with.


Although my grandparent's didn't embrace our heritage very much, my mom has made sure we learn about and celebrate our roots. We embrace our Dutch background by celebrating Sinter Klaas Day, complete with Boterletters and gift-filled wooden shoes (klompen).

We also embrace our Irish roots with a few Irish meals a year. My family's favorite is Limerick Ham. I first discovered this recipe in the book Cooking the Irish Way. Limerick Ham's distinctive flavor comes from Juniper berries and branches used in the smoking process. I made this recipe for the first time several years ago on St. Patrick's Day. I didn't have Juniper berries on hand, so I decided to tweak the recipe a bit. It turned out a success, and has been a family favorite ever since! Everyone is Irish on St. Patrick's Day, but you don't have to wait until March, this Limerick Ham turns everyone Irish, all year round!


Keaton's Limerick Ham


1 8-10 pound smoked ham, bone in
1 1/2 cups brown sugar
1/2 cup cracker meal
1/2 teaspoon ground cloves
1/4 teaspoon ground black pepper
1/8 teaspoon cinnamon
3 cups apple cider


1. Preheat oven to 400
2. In a medium sized bowl, combine brown sugar, ground cloves, cracker meal, black pepper and cinnamon.
3. Place the ham in a large baking pan. Pour the cider over and around the ham. Pack the brown sugar mixture on the top and the sides of the ham.
4. Cover with foil and bake for 20 munutes per pound, about 3 1/2 hours. Half way through cooking time, spoon the apple cider in the bottom of the pan over the ham.
5. Let the ham sit for 5 minutes, slice and serve.

Enjoy!

Saturday, November 13, 2010

Whole Wheat Focaccia with Roasted Garlic, Sun Dried Tomatoes and Rosemary

We're living in the age of technology. In so many words, technology helps us make things easier or more efficient. Facebook helps us connect with friends across the world. Iphones help us keep up with email and thousands of other tasks with the help of Applications. The Kindle give us access to thousands of books in the palm of our hands. For the most part, technology helps make life easier and more enjoyable.

Sometimes, though, technology can be a hindrance. Facebook has been known to cause drama between friends and exes more than once. Iphones and other smart phones seem to induce a zombie-like state in their many users. And the Kindle has taken away the magic of buying a brand new, stiff-paged, new-book-smell book. But the most tragic invention in the last 100 years is still used daily in kitchens across the world. It sits atop our counter tops, causing helpless individuals to fall victim of it's horrors. Scientist have projected that by 2050, this gadget will single-handedly cause the downfall of home cooking. So what is this toxic device? The bread machine. Since the 1980s, this gadget has turned home cooks into liars. That's right, throwing ingredients into a machine and pushing 'On' does not constitute homemade bread.


Okay, okay, I'm being a tad dramatic. But in all seriousness, bread making has become a lost art. Like any skill using your hands (gardening, painting, sculpting), it can be a tedious process, but rewarding nonetheless. There's almost something, dare I say, spiritual about bread making. Isn't it amazing that just by combining a few ingredients (which are boring and bland by themselves) working them with your hands and letting the dough rise, you eventually end up with a soft, warm, loaf of heaven? Whoever first thought to combine the right ingredients in the right proportions to form bread, is a saint.

Focaccia is my favorite bread, but I try to stay away from white breads altogether. But when the craving became too much to resist, I set out to make a whole wheat Focaccia that could stand up to it's white flour competitors. There's not much to say about this bread, except that it turned out awesome. I decided to really kick up the flavor, so I added roasted the garlic and sun dried tomatoes, along with fresh rosemary and lemon zest to add just that much more flavor. I am very pleased with this recipe, and I'm sure you'll enjoy it as well. There are several ways you can eat the Focaccia. Plain with a drizzle of olive oil or a pat of butter is delicious. My favorite: Cut the bread in half horizontally, and drizzle the halves with olive oil. Place under the broiler until slightly toasted. Remove, and top with slices of tomato and fresh mozzarella. Place under the broiler until the cheese has just melted. Or, slightly toast the focaccia and top with a poached or over-medium egg.

Whole Wheat Focaccia with Roasted Garlic, Sun Dried Tomatoes and Rosemary
Recipe adapted from 'Summertime Whole Wheat Focaccia Bread'

3 cups whole wheat flour
1 packet active dry yeast
1 1/4 cups warm water
1 head garlic
14 sun dried tomato halves, chopped (about 1/2 cup)
1 tsp salt
3 tbsp finely chopped fresh rosemary
3 1/2 tbsp olive oil
1/2 tsp lemon zest
Black pepper to taste
Sea salt

Roasting the garlic: Preheat oven to 375. Cut off the very top of the whole head. Remove the outer skin, leaving the cloves still in tact. Dip the cut end in olive oil.

Place on a baking sheet, and cover with foil. Roast in the oven for 50-60 minutes. Remove and let cool. Squeeze out the garlic from each clove.


Set the oven to 350.
In a small bowl, combine the olive oil, sun dried tomatoes, roasted garlic, rosemary, lemon zest and black pepper to taste. Set aside for 10 minutes.

In a large bowl, combine the warm water and yeast. Add the oil and tomato mixture, salt, and flour. Combine with a wooden spoon. If the dough is too sticky, add a bit more flour. If the dough is too dry, add a drizzle of olive oil.

On a floured surface, knead the dough in a folding motion until it has become elastic and smooth, about three minutes.


Coat the inside of the large bowl with olive oil, place the dough in it, and roll around to coat. Cover the bowl with a damp tea towel, and set aside in a dark, warm place. Let the dough rise, 30 minutes if you used quick-rise yeast, 60 if you used regular yeast.
After the dough has risen, punch it down once or twice. Again, knead the dough a few more times on a floured surface.


Place the dough onto a light greased baking sheet, and using a rolling pin, roll the dough to desired thickness- I like it about 1/2 inch thick. Poke holes with your finger all across the dough. Sprinkle with sea salt and black pepper to taste.


Bake at 350 for about 30-35 minutes. The bread will feel firm to the touch, and a toothpick inserted will remove easily.

Let bread cool for 10 minutes before slicing. Eat within 3 days, or freeze in a zip top bag. Enjoy!

Wednesday, November 3, 2010

Apple Cider Chicken and Seasonal Vegetables with Sage

What comes to mind when you hear the words 'Comfort Food'? Mashed potatoes with gravy? Southern fried chicken? Warm biscuits with a pat of melting butter? Unfortunately, many of our favorite comfort foods are some of the worst for us. However, with a little tweaking and a dash of know-how, you can cook a comforting and healthy meal, without sacrificing flavor.


When I awoke yesterday morning and saw frost on the grass outside, I knew it was the perfect day to make dinner for my family. What's better than sitting down on a cold evening, and enjoying a warm, filling meal together? Not much, in my book! My parents are from Iowa, so their idea of supper is meat, potatoes with gravy, and vegetables covered in butter. Tasty, but not exactly the most heart-friendly meal. So when I'm cooking for my parents, I like to make it hearty yet healthy, and simple but flavorful.


I've said it before and I'll say it again- I LOVE using seasonal produce. There's something almost spiritual about using the fruits and vegetables that flourish in each season. Not to mention they're at the peak of ripeness and flavor! Another favorite seasonal ingredient? Apples. They're no longer just for brown-bag lunches and snacks on the go. Apples pair wonderfully with Autumn's wide variety of seasonings and produce, so I decided to make it the star of our meal. I roasted a whole chicken with apple cider and herbs. Then, I combined apples with parsnips and carrots, and seasoned them with salt, black pepper and sage. Finally, I reduced apple cider and served it to drizzle over the vegetables and chicken. It was the perfect ending to such a chilly night. My family loved it, and we decided it was 'blog worthy,' so here it is!

Apple Cider Chicken and Seasonal Vegetables with Sage Serves about 3 with left over chicken

1 whole chicken
1 1/3 cup medium diced carrots
3/4 cup medium diced parsnips
2 1/3 cup large diced apples
2 cups apple cider plus a couple of tablespoons
Fresh Rosemary
Dried Sage
1 dried Bay leaf
Dried Thyme
Sea salt
Black pepper
Olive oil
Ground cloves

Special Equipment: Deep dish chicken cooker like this or an oven safe bowl and a beer or soda can.

1.Preheat the oven to 375 degrees.

2. In a bowl, combine 1 cup apple cider, 1 teaspoon fresh Rosemary, 1/8 teaspoon black pepper, a pinch dried Thyme, a small pinch ground cloves, and a whole bay leaf. If you're using the chicken cooker, pour the mixture into the well. If you're using an oven safe bowl and a can, pour the mixture into the empty can, and set in the center of the bowl. Place the chicken on top of the well or the can (make sure the chicken is steadied by the sides of the bowl, so the can won't spill)

3. Brush the chicken with olive oil, and season with sea salt and black pepper.

4. Place the chicken in the oven and roast for about 45 minutes, checking at 30 minutes. The thighs should reach an internal temperature of 180 degrees.

5. In a small sauce pan, combine about a cup of apple cider, a pinch of black pepper, and a few sprigs of Rosemary. Boil the cider until it has reduced by half, about 10 minutes.

6. To cook the vegetables, heat a large skillet over medium heat. Lightly coat the bottom with olive oil. Add the carrots and cook for about 2 minutes, stirring frequently. Next, add the parsnips. Add about 2 tablespoons apple cider, cover, and cook for about 5 more minutes. When the carrots and parsnips are nearly tender, add the apples and sprinkle with dried sage. Toss and cook until the apples are slightly softened.

7. When the chicken has finished cooking, let it rest for about 10 minutes before carving.

8. Serve the reduced cider on the side to pour over the chicken and vegetables. Enjoy!

Thursday, October 28, 2010

Low-Fat Pumpkin Chai Latte


I'm sure everyone will soon be sick of all my pumpkin posts and recipes, but Fall only rolls around once a year. I must take advantage of all the seasonal produce! This morning I was in the mood for a Starbucks Chai Latte and a Pumpkin Latte, but I had hip surgery two weeks ago, so I can't drive. Stranded at home, with a whole lot of time on my hands, I set out to make the ultimate combination of my two favorite drinks. Who doesn't love pumpkin? It instantly produces a comforting, warm and fuzzy feeling, not unlike that feeling when you're seated for Thanksgiving dinner with your family. Hot Chocolate has taken a back seat and Chai tea has surfaced as the newest warm-me-up-on-a-cold-day-drink. Combining the two was a no-brainer, and it turned out wonderfully. Not only is it tasty, but this latte is also packed with health benefits. Black tea and cinnamon contain powerful antioxidants and pumpkin is packed with vitamins and fiber. You can use decaf or regular tea, and of course, adjust spices to taste. So get steeping, and go curl up with a nice book!

Low-Fat Pumpkin Chai Latte
Serves 2

2 cups water
2 black tea bags
1 cup skim milk
1/4 cup canned pumpkin
1 slice fresh ginger (about 1 /8 inch)
1 cinnamon stick
1/2 vanilla bean
Freshly ground nutmeg
Ground cinnamon
Ground cloves
1 teaspoon honey

In a medium sauce pan, heat the water to a simmer. Split the vanilla bean in half and place on a piece of cheesecloth along with the sliced ginger, cinnamon stick, a pinch of ground cloves, about 1/8 teaspoon ground cinnamon, and a pinch of freshly ground nutmeg. Tie the cheesecloth and place in the simmering water with two tea bags. Turn off the heat and steep for 3-5 minute, then remove the tea bags. In a bowl whisk together the milk and pumpkin. Take a ladle of the tea and whisk it into the pumpkin and milk mixture. Slowly whisk about one third of the tea into the milk and pumpkin. Now, slowly pour the milk and pumpkin into the sauce pan and stir. Cook over low heat for about 3 minutes. Remove the cheesecloth and discard. Stir in the honey and serve.


Calories: 64 Fat: .3g Carbohydrates: 11.3g Fiber: .9g Protein: 4.5g

Tuesday, October 26, 2010

Pumpkin Dog Biscuits

With just 5 days left until Halloween, pumpkins are everywhere! You may know that pumpkin is packed with powerful nutrients. But did you know that these nutrients are beneficial to your dog, too? The fiber in pumpkins has long been a cure for dogs with gastrointestinal issues. But many of the vitamins and minerals found in this popular squash work the same way in dogs as they do humans. Vitamin C helps boost immune function, potassium promotes bone strength, Beta- and Alpha- carotenes help ward off cancer, and Vitamin A protects eyes from cataracts- a big concern for older dogs.

I love my dogs like family, so I wanted to create a healthy treat for them to enjoy. In light of the upcoming holiday, I decided to make these Pumpkin Biscuits. They're really easy to make, and very healthy too- no fat! Just make sure to let the family know they're for the pets, because they look identical to cookies! If you get a lot of tag-along canine trick-or-treaters, these make wonderful treat bags. Just wrap a few biscuits in cellophane, and tie with orange and black ribbons. The dogs will love them, and the kids will be just as excited. Happy Halloween!


Pumpkin Dog Biscuits

2 1/4 cup whole wheat flour
1/4 cup old fashioned oats (uncooked)
1/4 cup cornmeal
1/2 cup canned pumpkin
2 egg whites
pinch cinnamon

Preheat oven to 275. In a large mixing bowl, combine dry ingredients. In a separate bowl combine pumpkin and egg whites. With a large spoon, mix wet ingredients into dry ingredients. Once the mixture has come just come together, use your hands to incorporate all the ingredients together and form a large ball. The dough should be slightly tacky but not sticky. Knead more flour into the dough if it is too sticky. Roll out the dough with a rolling pin to about 1/8 inch thick. Use cookie cutters (I used pumpkins, and maple leaves) to cut out shapes. Bake the biscuits on a foil or parchment lined cookie sheet for about 1 to 1 1/2 hours, or until hard. Cool the biscuits on a cooling rack.

Tuesday, October 12, 2010

Roasted Pumpkin Seeds

This October when you're carving a pumpkin, save the seeds. They're so easy to roast, and they make a delicious, healthy snack. Pumpkin seeds, also known as Pepitas, are packed with all kinds of nutrients, such as manganese, magnesium, iron, vitamin K, and protein.

Roasting your own pumpkin seeds is a fun activity for the whole family. There's something special and rewarding about eating pumpkin seeds that you've harvested, cleaned, roasted and seasoned. Store-bought seeds are no match for homemade!

I've included basic instructions and recipes on how to prepare the seeds, but it's up to you to experiment and tweak the seasonings to your liking. There's no right or wrong way to make them. If you have a favorite combination of seasonings and spices, please share!

Harvesting and Cleaning the Seeds
Different pumpkins have different seeds. Your typical carving pumpkin provides large seeds with a white husk. Small baking pumpkins have little seeds without the husk. What kind you use is completely personal preference. If you just like the inside seed, go with the baking pumpkin. If you like the tough husk, use the carving pumpkin.

Cut off the top of the pumpkin and scoop out the seeds and pulp. Separate the seeds, you don't need the pulp so throw it away, or even better, toss it in your compost pile. Put the seeds in a colander or strainer, and rinse under warm water, cleaning off any leftover pulp and goop (yes, that's a technical term). Once the seeds are clean, shake off all remaining water, and transfer them to a tea towel. Spread the seeds over the towel in a single layer, and roll up the towel. Let the seeds dry completely.

Roasting the Seeds
There's a few ways you can roast your seeds. You can use a Silpat (a silicone baking sheet), a cookie sheet lined with foil, or my favorite, parchment paper with holes. The first two are pretty straightforward. I like to use the parchment paper method because it allows air to circulate underneath the seeds, which leads them to cook more evenly and be very crunchy. It just takes a few minutes, and from my experience, is well worth the time.

First, place a cooling rack on top of a cookie sheet. Place a piece of parchment paper on top of the cooling rack, large enough to be tucked underneath the rack on the sides. Using something small and sharp to poke holes all over the paper. (Think push pin or an eyeglass screw driver) The holes need to be large enough to allow air to circulate underneath the seeds, but small enough so the seeds don't fall through. You need a lot of holes.

We're ready to roast. Spread the seeds on your surface of choice If you have a convection oven, preheat it to 325 and cook the seeds for about 8-10 minutes. If you have a conventional oven, preheat it to 350, and cook the seeds for 10-15 minutes. Again, cooking time is personal preference. If you like your seeds a bit chewy, cook them for a shorter amount of time. If you like them very crunchy, cook them for a longer amount of time. Just keep an eye on them, because once they're burnt, they're burnt.

Just about every recipe I found online seasoning the seeds before roasting. This way, you can cook all the seeds at once, then divide them and season them, instead of having to use a different pan for each 'flavor.' So following are a few basic recipes. Again, personal preference. Alter, experiment, omit. Use these recipes as a starting point.

Garlic and Herb
1/4 cup roasted seeds

1/8 teaspoon garlic salt

1/4 teaspoon dried thyme

1/4 teaspoon dried basil

1/4 teaspoon dried rosemary

Olive oil

Combine the salt and herbs together. Very lightly coat the seeds with olive oil, and add them to the herb mixture. Toss to coat, and spread the seeds on parchment paper to dry.


Black Pepper, Sea Salt and Olive Oil
1/4 cup roasted seeds

1/4 tsp olive oil

black pepper

sea salt

Toss the seeds with the olive oil. Next, season the seeds with black pepper and sea salt to taste. Spread the seeds on parchment paper to dry.


Autumn Spice Candied Pumpkin Seeds
1/4 cup roasted seeds

1 teaspoon maple sugar (brown sugar works fine, but maple sugar is really spectacular)

1/8 teaspoon cinnamon

a pinch of ground ginger

a pinch of nutmeg

water

In a small bowl, combine just enough water with the maple sugar to make a think paste. (1 or 2 drops is plenty.) Heat in the microwave for 5 second intervals, until the sugar has melted. Stir in the cinnamon, ginger and nutmeg. Add the pumpkin seeds and stir to coat. Pour the seeds back onto a nonstick baking surface (parchment or Silpat) at 350 for 2-3 minutes. Remove from the oven and let cool on the baking sheet.


Make your own recipe by experimenting with different herbs and spice. A few may include cayenne, paprika, oregano, cumin, and seasoning salts.

Store the seeds in a zip-top bag in a cool, dry place. Enjoy!

Friday, October 8, 2010

Tri-Color Asian Salad


I'm all about simplicity. Less is very often more. That's why this salad has 3 main ingredients, cucumber, carrot, and jicama, and a very simple dressing. It's light, fresh and wonderfully crunchy. If you've never tried jicama, this is a great opportunity. Jicama is a root that looks like a turnip. It is very sweet, and it's texture is similar to a potato. This salad is low in calories and packed with nutrients. This dish is also a perfect time to practice your knife skills. We'll be cutting the carrots into batonnets (1/4 x 1/4 x 2-2 1/2 inches), and julienning (1/8 x 1/8 x 2-2 1/2 inches) the jicama, and simply cutting the cucumber slices into 6 equal pieces. To learn how to batonnet click here. To learn how to julienne, click here.

Tri-Color Asian Salad
Serves one

12 slices peeled cucumber, each cut into six pieces
8 baby carrots, batonnet
1/3 cup julliened jicama
1 teaspoon orange juice
1 teaspoon soy sauce
1/2 teaspoon rice wine vinegar
1/8 teaspoon honey
Pinch freshly grated ginger
Pinch freshly grated lemon zest
Black pepper to taste
Sesame seeds

Mix the vegetables together in a bowl. In a small bowl, combine the orange juice, soy sauce, rice wine vinegar, honey, ginger, lemon zest and black pepper. Add the dressing to the vegetables, toss together quickly. Use tongs to place the salad on a plate, and sprinkle sesame seeds on top. Enjoy!

Calories: 54 Carbs: 12g Fiber: 4g Fat: 0g Protein: 2g

Wednesday, October 6, 2010

Butternut Squash with Apples and Caramelized Onions

Fall is my favorite season. The smell of bonfires, the colorful leaves that fill the trees, hot apple cider and fuzzy sweaters. But most of all, Fall is my favorite season because the wonderful produce that is available. Parsnips, apples, sweet potatoes, pumpkins, and several varieties of squash- just to name a few. There's something so comforting, so rustic, about a warm vegetable dish on a cool fall evening.

I created this recipe last week, and have made it, tweaked it, and enjoyed it three times since. It really highlights the squash and apple's natural flavors, there's not much seasoning needed when the produce is at it's peak freshness. The onion and balsamic vinegar add a bit of sweetness, and the apples are perfectly crunchy. If you want to add a bit of creaminess, sprinkle a bit of feta on top, but I like to keep it simple. This is a great dish alongside a hot cup of tea. Enjoy!


Butternut Squash with Apples and Caramelized Onions
1 serving

1/2 small Butternut Squash (about 6 oz), 1/2 inch cubes
1 medium apple, medium dice
1/4 cup chopped onions
1 tablespoon Balsamic vinegar
2 Basil leaves
Dried thyme
Ground sage
Black pepper
Salt
Olive oil

1. Heat a saute pan over medium heat with just enough oil to coat the bottom. When the oil becomes shiny, add the onions. Cook until the onions have become browned and translucent. Remove them from the pan and set aside.

2. Add the butternut squash to the saute pan, add an ice cube and cover. Cook until slightly tender, or about 5 minutes, stirring often. Meanwhile, heat the balsamic vinegar in a small saucepan, and cook until reduced by half. Remove from heat.

3. When the squash is tender, add the apples, 1/4 teaspoon dried thyme, a pinch of ground sage, and salt and pepper to taste. When the apples are slightly tender, stir in the caramelized onions. Spoon onto a plate, and drizzle the balsamic reduction over top. Sprinkle shredded basil leaves on top, and serve. Enjoy!

Calories: 175 Fat: 1g Carbs: 45g Fiber: 10g Protein: 2g

Thursday, September 30, 2010

Lemon-Poppy Seed Cookies

Think of the last time you ate a 'healthy' cookie. It probably tasted something like cardboard, right? That's the problem for us health freaks-cuisine can easily be made healthier, but it gets complicated with baking. Baking is a science, so it's hard to swap out fattening ingredients with more nutritious ones- it completely changes the chemistry of the recipe! But with a little know-how, you can make a delicious, and nutritious cookie. I put my know-how to work with these Lemon-Poppy Seed Cookies. I saw the original recipe in Martha Stewart Living Magazine, and like a mad scientist set out to make a lower calorie, guilt-free version. I swapped oil with yogurt, sugar with Splenda, and white flour with whole wheat. Friends and family agree, this recipe is a keeper! Enjoy with a hot cup of tea!


Lemon-Poppy Seed Cookies
Adapted from http://www.marthastewart.com/recipe/lemon-poppy-seed-cookies-edf
Serves 26

1/2 cup whole wheat flour (spooned and leveled)
1/8 tsp table salt
1/4 tsp baking soda
1/4 cup Splenda
1/4 cup sugar
2 large egg yolks
2 tbsp poppy seeds
1 tbsp fat-free vanilla yogurt
1 packed tsp finely grated lemon zest
1 tsp lemon juice
seeds from 1/2 vanilla bean (or 1/2 tsp vanilla extract)

1. Preheat oven to 350.
2. In a medium bowl, combine flour, salt and baking soda.
3. In a small bowl mix together sugar, Splenda, egg yolks, poppy seeds, yogurt, lemon zest, lemon juice and vanilla seeds.
4. Stir mixture into flour until just combined.
5. Drop dough by teaspoons 2 inches apart onto a Silpat or parchment paper-lined cookie sheets. 6. Bake cookies 10-14 minutes, rotating 1/2 way through. Cookies should be lightly golden brown.
7. Transfer to wire racks and cool completely.
8. Store in an air-tight container.

Nutrition Facts
Calories: 23 Fat: .7 g Cholesterol: 15.5 g Sodium: 23.4 mg Carbohydrates: 4.3 g Fiber: .3 g Protein: .6 g

Friday, September 17, 2010

Dessert Centerpieces for the Women's Bible Study

Am I good at procrastinating or what? I have a good excuse though. I have been BUSY!

I have started Culinary School and I love it! I have already learned so much, and I am so excited about what I will learn in the future!

A lot of people from my church are really supportive of my passion for baking, and the ladies from the Women's Bible Study asked me to make dessert centerpieces for the bible study opening brunch! So for the past month and a half, my mom and I have been planning and shopping, and I have been perfecting the recipes for each dessert. The opening brunch was this past Tuesday, and it went great! There were (miraculously) no mess-ups or mishaps, and it went as smoothly as possible! I thought I would share some pictures with you all and see what you think! All the recipes are my own, except for the biscotti and apple dip. Everything else I created myself! If you would like any of the recipes, please comment and I'd be more than happy to share them with you.

Here I am working the night before. For three days I had been baking non-stop. Monday night I was up until 2am baking, then woke up at 6:30 to finish up! We had to be set up by 9am! My dog Buddy was a very helpful vacuum whenever I dropped anything.


Here is my favorite dessert. These are miniature chocolate cakes layered with espresso ganache and topped with buttercream frosting. I wanted them to look like little espressos with foam on top! I started by making chocolate cakes in 9 inch cake pans, and cutting out 2 small circles per cup. I filled the bottom of the cup with espresso ganache, put a cake circle, more ganache, another piece of cake, and finally piped the frosting on top.

The little espresso cake, up close. I sprinkled a bit of espresso powder on top.


Next are miniature no-bake cheesecakes. I didn't want them to be as dense as classic cheesecake, so I folded Cool-Whip into the cream cheese 'batter' to make them light and fluffy. I also added lemon zest, vanilla, and powdered sugar. The crust is a simple graham cracker crust, and there are three different toppings: Blueberry, raspberry, and strawberry. I made the sauces by pureeing the fruit, passing it through a fine sieve, and cooking the juice with sugar and cornstarch. A cheesecake close up!


These are one of my favorite creations, 'Dutch' Donuts. I used the same almond filling used to make the Dutch cookies 'Boterletters' or Dutch letters. I made a simple cake donut recipe and thickened it up with a bit of flour. Then I stuffed the dough with the almond filling and fried them, and sprinkled a bit of powdered sugar on top. I made a simple glazed of powdered sugar and milk to go on top.

Here is almond biscotti with a chocolate ganache and apple slices with a cream cheese and brown sugar dip.

There are two different kind of muffins here. Pumpkin and cranberry-apple. I also made a maple butter to go with them! Both are made with whole wheat flour and NO oil. I had to have SOMETHING healthy, right?! The maple butter was made by melting maple sugar and butter, then whipping it into room temperature butter.

Here's the last centerpiece. The top are my latest creations, Caramel Apple Tarts. I wanted to play off the Autumn theme and combine apple pie with caramel apples. The crust is a snickerdoodle cookie baked in a tart pan. The apple filling is basically an apple pie filling, only cooked over the stove, with lots of flour, brown sugar and apple cider. The bottom are mini pumpkin pies, my grandmas pie recipe just miniaturized!

Here they are after the centerpieces were moved to the desserts table. My wonderful mom made fruit spears, fruit cups, and mini cupcakes to look like sunflowers.


Here I am asleep after all the ladies left. The week had caught up to me!


This is a 'Thank You' gift the ladies made me. It is now hanging in my kitchen! The text on the apron says 'Taste and See That The Lord is Good.' Which was the theme for the brunch.


I had SO much fun doing this. It was a LOT of work, but very worth it, and great experience. Next up: Engagement desserts and wedding cupcakes!

Friday, July 16, 2010

Lamb Chops with Lemon Thyme Couscous and Cherry Plum Reduction

When I was a small child, I dreamed of becoming a clasically trained chef. But after watching countless reruns of Jacques Pepin, Emeril Lagasse and Julia Child, I learned that many, if not most dishes, are composed of hardly-healthy ingredients. The food tastes wonderfully, of course. But for the health conscious chef and diner, these delectable dishes are not generally an option. Luckily, you can cook equally delicious meals at home, minus the extra fat and calories. There’s no need to skimp on flavor and quality when you’re watching your weight, and you don’t need to cover your protein in butter or cream based sauces. With a little creativity, you can eat just as well as the Chefs of France, in your very own home.

My newest recipe is inspired by the concept of ‘High end-low calorie’ food. Lamb Chops with Lemon Thyme Cousous and a Cherry and Plum Reduction. The lamb chops are broiled instead of braised to cut back on fat. The couscous is whole wheat instead of nutritionally-deficient regular couscous, to offer more fiber and nutrients. The cherry and plum reduction is made of just three ingredients, and is sweetened and thickened by the fruits’ natural sugars. The lamb is rich and perfectly seasoned, the couscous is light and fragrant, and the Cherry-Plum reduction is a touch tart balanced with natural sweetness. Homemade, healthy food that you would expect to find on a pricey restaurant menu. Top Chef here I come!


Lamb Chops with Lemon-Thyme Couscous and Cherry-Plum Reduction

2 Small lamb Chops (With bone, about ½ pound)
1/3 cup Whole Wheat dry couscous
1/3 cup reduced-sodium, fat free chicken broth
8 bing cherries, pitted, quartered
1 plum, chopped into ¼ inch pieces
½ tablespoon balsamic vinegar
1 medium clove garlic, minced
Thyme
1 lemon
Black pepper
Salt
Cooking spray (or olive oil spray)

1. Season the lamb chops generously with salt, pepper and thyme. Set aside.
2. In a small sauce pan, heat a small spritz of cooking spray over low heat. Cook garlic until slightly tender and translucent, about 2 minutes. Add chicken broth, black pepper to taste, and about 1/4 teaspoon dried thyme. Bring to a boil, stir in couscous, a squeeze of lemon juice, and about 1/2 teaspoon lemon zest. Remove from heat, cover and set aside.
3. In a separate small sauce pan, cook the chopped plum over low heat. Use a fork or potato masher to slightly mash the plum. Cook for about 4 minutes, or until the plum juice starts to thicken. Stir in the cherries and continue to cook over low heat.
4. Meanwhile, heat the broiler on medium, or about 500 degrees. Place the lamb in a lightly greased, oven safe skillet, and cook for a total of 12 minutes, turning halfway through.
5. Finally, add a pinch of black pepper and balsamic vinegar to the fruit reduction, and cook until reduced to a thick sauce.
6. Let lamb rest for 2-3 minutes before plating. Plate couscous first in a small mound and spoon the cherry-plum reduction on the rest of the plate. Place lamb chops on top of sauce, leaned against couscous. Enjoy!

Nutrition: Calories: 425 Fat: 8.6 g Cholesterol: 85.1 mg Sodium: 405.3 mg Carbs: 54.9 g Fiber: 3.9 g Protein: 34.4 g

Wednesday, July 14, 2010

Peach and Berry Frozen Yogurt

I was so happy with the Mocha Frozen Yogurt, that I decided to create a new recipe. I was inspired by all the summer produce which fills my kitchen. I used fresh, juicy peaches, plump blueberries and homegrown raspberries. Although it can be quite expensive, fresh fruit truly makes a difference, so definitely use it rather than frozen fruit if you can. You can get creative with this recipe. Try using blackberries or mulberries in place of the raspberries, nectarines or plums instead of peaches, or at the last few minutes of freezing, mix in pieces of fresh strawberries. Take advantage of the wonderful produce for which summer is famous!

Peach and Berry Frozen Yogurt
Makes 25 scoops

1 cup peeled, chopped peaches (about 7.5 oz)
1/3 cup raspberries (about 2.4 oz)
1/4 cup blueberries
1 1/2 cups vanilla fat-free yogurt
1 1/2 cups fat-free plain yogurt
1/4 cup Splenda no calorie sweetener
1/2 cup fat free milk
1/2 teaspoon vanilla extract

In a large bowl, mash the peaches and raspberries until smooth. (Leave a few chunks here and there for texture.) Add yogurts, Splenda, milk, and vanilla. Stir in blueberries. Freeze in an ice cream freezer according to manufacturer's directions. Transfer to a container, cover and freeze. It melts fast, so eat it quick!

Nutrition Per Scoop
Calories: 20
Fat: 0g
Sodium: 18.2 mg
Carbs: 4.9g
Fiber: .3g
Protein: 1.3g

Tuesday, July 13, 2010

Seriously Healthy Mocha Frozen Yogurt


Relish Magazine recently published a page full of low-fat, frozen yogurt recipes. While a food may be low fat, that does not make it healthy. Some recipes had over 200 calories per serving, which means this recipe can only be eaten as a treat once in a while, and you might as well eat real ice cream, cream and all. I don't want to 'make room' in my diet for anything, I want to be able to eat dessert without sizing up my belly in the mirror afterward.

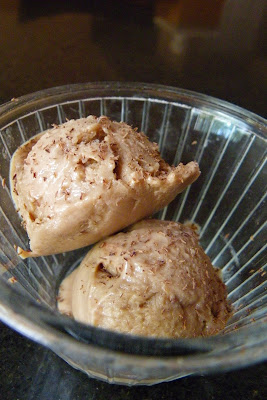
I was inspired by their Mocha Frozen Yogurt recipe. Although each serving (8 total) contained only 120 calories, the recipe called for an entire pint of chocolate milk. There is nothing healthy about a pint of chocolate milk! So I set out to revamp their Mocha Frozen Yogurt, cut out the chocolate milk, the granulated sugar, and even more fat. The result? A creamy, tangy, chocolaty, coffee-y, frozen yogurt, with only 39 calories per serving- and zero guilt.

Seriously Healthy Mocha Frozen Yogurt
Makes about 11 servings (1.5 ice cream scoops or 2 large cookie dough scoops)

2 cups plain, fat free yogurt
1 cup vanilla, fat free yogurt
1 tsp vanilla extract
1/2 cup fat free milk
2 1/2 tsp espresso powder
1 tbsp + 1 tsp unsweetened cocoa powder
1/2 cup Splenda no calorie sweetener
Pinch cinnamon

In a small sauce pan, heat the milk over very low heat. Whisk in the espresso powder, cocoa powder and Splenda until dissolved. Do not boil. Set aside to cool. In a separate bowl, combine yogurt and vanilla. Stir in the cooled milk mixture and cinnamon. Freeze in an ice cream freezer according to manufacturer's instructions. Immediately scoop into small bowls or ramekins, cover and freeze. Enjoy!

Calories: 39
Fat: .1g
Sodium: 43.9mg
Total Carbs: 7.6g
Fiber: .1g
Sugars: 4.6g
Protein 3.0 g

Friday, July 2, 2010

Green Ways to Grow Herbs

My, my, my, how time flies. It has been over a month since my last post! June has been absolutely crazy, and my computer has been on the fritz. (Think 1 hour to upload 1 photo.) But I just received my new laptop which is much faster, so I hope to be posting more often! Thanks to all of my readers who have been checking in for new posts and asking when I would be updating Table for One. Your support means so much!
Green Ways to Grow Herbs


Look in nearly every chef's kitchen and you're sure to find one thing in common: Herbs. Across the globe and in every culture, herbs are used to flavor all kinds of dishes. A few leaves of basil or a pinch of oregano can instantly turn any dish from bland to brilliant. But herbs offer much more than just flavor. They also pack all kinds of nutrients and health benefits. For example, Rosemary contains antioxidants which can help ward of certain types of cancer. Unfortunately, dried herbs often lack the falvanoids and oils which make fresh herbs so flavorful and nutritious. But don't fret! Growing your own herb garden is MUCH easier and cheaper than you might think.

This month I've found myself falling more and more in love with nature. I've spent my days picking mulberries and raspberries, and I realized how much tastier food is when you grow it yourself! So I set out to grow more of my own food- I started an herb garden. I decided to recycle by planting my herbs in containers I found around the house or made myself. So I set out around my house, like a mad scientist, rummaging through closets, picking through our recycling and garbage cans. I got creative. After I planted my herbs, I was amazed at how quickly they sprouted! It has been less than a month and I am already enjoying fresh basil and cilantro.

Pick your herbs.
There are so many herbs to choose from, it can make your head spin! Here's a list of basic herbs as well as their flavor components and health benefits.

  • Basil: This herb is an excellent source of Vitamin K, which helps blood to clot and can help ward of certain cancers. Basil is also a good source of Iron, Calcium and Vitamin A. Basil also contains anti-inflammatory properties and can help protect your body from free-radical damage. Basil is slightly sweet, slightly spicy and has licorice undertones. This herb is commonly used in Italian cooking, and stars in Pesto and pairs well with tomatoes and mozzarella.
  • Thyme: Thyme is an excellent source of iron, maganese, and vitamin K. This herb is also jam packed with antioxidants. It has also been used medicinally to treat upper respiratory ailments. Thyme is a bit pungent and clove-like. It is savory, and a little goes a long ways. Great with all meats and roasted vegetables.
  • Rosemary: Rosemary is used to boost immune function, increase circulation and has anti-inflammatory compounds. This herb has a pine-like flavor and is very fragrant. Rosemary is great for flavoring chicken and lamb dishes.
  • Cilantro/Coriander: Cilantro, also known as Coriander, can raise 'good' cholesterol while lowering 'bad' cholesterol. It may also stimulate insulin production in diabetic. Cilantro is a spicy herb and is often used fresh in Mexican dishes.
  • Sage: Sage is closely related to Rosemary, and also has anti-inflammatory properties as well as antioxidants. Sage is earthy and minty, with a hint of lemon. Sage is a staple in stuffing! Use to flavor savory dishes such as stews, soups, poultry and fish.
  • Parsley: Parsley isn't just for garnishes anymore! This herb has properties which have been known to inhibit tumor growth. Parsley is also a good source of folate, which helps keep the heart healthy, and an excellent source is vitamins A, C, and K. Parsley is mild, slightly peppery, and savory. Use it to flavor pastas, soups, vegetable dishes, and to pair with other herbs.
  • Oregano: Oregano is packed with antioxidants. Also, it contains potent anti-bacterial properties. Oregano is also a very good source of fiber, maganese, and iron. This herb is earthy and a distinct clove-like flavor. Use Oregano to season any tomato dish, as well as poultry and fish.

You can find many varieties of seeds nearly anywhere that specializes in home and garden. Home Depot, Target, Walmart, Ace. There are many varieties of each herb, so read the description of flavor on the back of the seed packet. Make sure to check the expiration date on your seeds, they do spoil.

Pick Your Pot.


You don't need to go to Home Depot and spend big money on new pots and planters. You'd be surprised how many containers you can find around the house that can be recycled as pots! Here's a few ideas.
  • Disposable Water Bottles. We've all seen the commericals. 1 hour on the treadmill, for ever in a landfill. Although everyone should be using a reusable water bottle, many of us don't. So instead of tossing your plastic water bottles in the trash, use them for your herbs. Simply use a sharp serrated knife and cut the bottle in half. Plant your herbs in the bottom half. (You can save the top half and use it for a funnel to fill up bird feeders or a scoop for the cat food!)
  • Other drink containers. Water bottles aren't the only containers that can be recycled! Nesquick Chocolate milk, 2 liter soda bottles, Sobe life waters, (I like these, they're very sturdy) energy drinks. Just rinse out your bottle of choice and cut in half or to desired height.
  • Fish bowls. Nemo took his final swim years ago, so get out that fish bowl and put it to use! You can also use the small plastic aquariums that hold fish and hermit crabs. Get creative and add colored marbles or rocks to the bottom before filling with dirt.
  • Coffee mugs. Most of us have more coffee mugs than we really need, so pull out your Disney World 1994 and Worlds Coolest Sister mugs and get planting! You can make your herb garden look funky by mixing and matching your mugs, or more uniform by using all the same color/style.
  • Mason Jars. Next time you finish your grape jelly rinse it out and save it. Mason jars make adorable planters!
  • Egg cartons. Cut off the top of the egg carton and save the 'egg part.' Fill each hole with dirt and plant different seeds in each one!
  • Empty paint cans. Just clean out the inside- the paint on the outside gives it character!
  • Old baking dishes. Muffin tins are great for planting several different herbs.
  • Disposable Coffee/drink cups. My favorite reusable planter is a clear iced coffee cup...You know, like the tall kind from Starbucks? I have mine on my window sill!
  • Food tubs. Yogurt cups, sour cream, even peanut tins work well for herbs.
  • Get creative. Practically anything that can hold water can be turned into a planter for your herbs. Buckets, unused safe boxes, old soup bowls. Use your imagination!

Pick your dirt. The type of soil you want to use for your herb garden is entirely up to you. I like to use my own soil from my garden as often as possible. This ensures that my soil is free of fertilizers and additives. If you like, you may also use a bag of basic top soil found at any gardening our home store. Look for basic soil, without fillers or fertilizers. Remember, you are what you eat. Whatever is in your soil will end up in your food, which ends up in you. You can also save money by mixing in a bag of store-bought soil with the dirt from your yard. Whatever soil you decide to use, make sure it is very fine and moist. Make a healthy mixture of soil by incorporating ground eggshells, used teabags (not the bags, just the tea!) and compost. You'll have thriving plants without having to use toxic fertilizers.

Planting. Now the fun part! You've picked which herbs to plant, you've bought your seeds, you've scavenged for containers, you've mixed up your dirt. Now it's time to plant! If you have a tall container, fill the bottom with rocks or marbles to use less dirt. Fill the container to the top, and follow the planting directions on the seed packets. Make sure to cover the seeds with a very fine layer of dirt, so they are not smothered. Water the plants right away with a spray bottle- using a watering can will drown and dislodge the seeds, but a spray bottle will give a gentle, even mist. Water your herbs at least once a day, more if it is extremely hot outside.

Pick a spot. Your herbs are planted, and you've surely got a funky array of containers. Now it's time to decide where to put them! Each herb has different sun requirements. Some may need full sun, some may need shade, others adapt to whatever weather. Place your herbs somewhere where each herb can get the sunshine it needs. For example, a patio which is partly covered by a tree. The herbs which require full sun can sit out uncovered, while herbs which need shade can be placed under the shade of the tree. I have my herbs placed on a shelves my dad made. The plants which need most sun are on the top shelf, and the plants which need less sun are on the lower shelves.

Window sills are also a fun way place to plant herbs, especially in the kitchen, for easy access. Just make sure to water them every day, and rotate them so the entire plant gets the sun it needs.

Name 'em. I like to mark each pot by writing the name of each herb on a popsicle stick with a permanent marker. Just stick them in the dirt and you're ready to go!

Most herbs will take about 7-14 days to sprout, and will be ready to harvest in about a month. After you use your home-grown, fresh herbs for the the first time, you'll realise that all your hard work is definitely rewarding. The health benefits and fantastic flavor are unmatched, and will make an essential addition to your healthy cooking!

Wednesday, May 19, 2010

Homemade-Applesauce Muffins

These muffins have quite a story. They started out as a craving for banana bread turned healthy (the recipe is 2 posts down!). In the banana bread recipe, I used applesauce instead of oil to make the bread healthier and more moist. While I was making the bread, I got half way through the recipe, when I realized I didn't have applesauce. So, I cored, chopped and cooked down an apple and made my own. It worked great, and the banana bread came out wonderfully.


So, a few days later, there I was, just minding my own business when WHAM! A craving for muffins. I remembered that the recipe for the banana bread which I had adapted, had mentioned using the batter for banana muffins as well. I made my way to the kitchen, and, of course, no bananas in sight. My MacGyver skills kicked in, and I gathered my supplies. I wasn't coming out of that kitchen without muffins. No, not today.

I 'settled' with apples. I figured, I had cooked one down for the banana bread, what happens if I only use apples in place of the bananas. Let me tell you, these muffins turned out wonderfully. They are so moist, with just a few tiny chunks of apples here and there. They're surprisingly sweet for using such a small amount of sugar, and the amount of cinnamon is perfect. My family is in love with these muffins, and at the moment, there are only three left from our second batch this week! My boyfriend also loves these muffins, calling them Apple Pie Muffins, because he's convinced they taste just like apple pie.


Of course, the greatest thing about these muffins, is how healthy they are. They're only 84 calories each. Yeah, you read that right. Not to mention the fact that there is no added fat, and they're made with whole wheat flour and minimal sugar. Every day I have one for breakfast AND a bedtime snack. They're wonderful warmed in the microwave with a spritz of spray butter, or room temperature. Have fun baking and enjoy!

Nutrition info is below the recipe!
Homemade-Applesauce Muffins
Makes 21 muffins
5-6 small apples, cored (about 26 oz, or 1lb 10 oz)
2 cups whole wheat flour
1/2 cup sugar
1/4 cup splenda
1/4 cup old-fashioned oats, uncooked
3 tsp baking powder
1/2 teaspoon baking soda
1/2 teaspoon salt
2 teaspoons cinnamon (divided)
1 teaspoon milled flax seed
dash apple pie spice
1 egg
3/4 cup skim milk
1 teaspoon vanilla extract
1 teaspoon honey
Preheat oven to 350.
Prepare 21 muffin tins with muffin papers, lightly sprayed with canola oil.
1. Chop the apples into 1 inch chunks. Place in a large saucepan and combine with 1 teaspoon cinnamon. Cover, and cook over low until the apples are softened (15-20 minutes). Stir often. Remove the top if too much liquid accumulates in the pan.
2. Drain the apples in a large colander. Once cooled, puree the apples in several batches until they have reached a slightly chink applesauce consistency. Measure 1 3/4 cup applesauce (eat the rest!) and set aside.
3. Combine all dry ingredients (including remaining cinnamon) in a large bowl.
4. In a separate bowl, whisk together egg, milk, vanilla extract, honey, and cooled applesauce.
5. Add the dry to the wet ingredients, stirring with a spatula or wooden spoon, until just combined. Do not over mix.
6. Use a large spoon or cookie dough scoop, and measure equal amounts into each muffin tin, about 3/4 full.
7. Bake for 20 minutes, or until a toothpick inserted in the center of a muffin comes out clean.
Enjoy!
Nutrition
Calories: 84 Fat: .7 g Carbohydrates: 19 g Fiber: 2.2 g Sugars: 5.6 g Protein: 2.3 g

Monday, May 10, 2010

Rosemary Chicken and Rice Soup


I have a pretty sensitive stomach, this week especially. Today I knew that I wouldn't be able to eat a heavy meal, but I was in the mood for something hearty. So what came to mind? Chicken soup of course. Maybe it is a placebo effect, but chicken soup cures all ailments! When I looked in my pantry, though, all I found was sodium-packed, condensed chicken noodle soup...I don't think I need to mention names.

So I set out to make a homemade chicken soup, that was healthy, hearty, yet still easy on my stomach. I was pleasantly surprised as to how delicious this soup turned out to be! It was super quick to make (15 minutes from start to finish!), flavorful and filled me up without upsetting my stomach.

This soup is delicious for when you're feeling under the weather as well as when you're feeling fine!

Rosemary Chicken and Rice Soup
Serves One
1/2 cup brown instant rice
1 & 1/2 cups + about 1/2 cup low sodium chicken broth
1 small chicken breast (about 2.5 ounces)
8 baby carrots
4 slices baby bella mushrooms (or 1 whole mushroom)
Rosemary
Thyme
Salt
Pepper
olive oil

1. Prepare the instant rice on the stove, following the package directions, substituting water with chicken broth. Add about 1/4 teaspoon dried rosemary. When the rice is prepared, add about 1 & 1/2 cups chicken broth. Simmer over low heat.

2. Season the chicken breast lightly with salt, pepper, thyme and rosemary. Cook in a small skillet over medium heat, about 3-4 minutes per side, or until thoroughly cooked. Set chicken aside and return pan to heat. Spray lightly with olive oil.

3. Chop the baby carrots into small rounds and toss in the hot pan for about 2 minutes, or until tender. Add to the rice and chicken broth.

4. Chop the chicken breast into small pieces and add to the pot of rice and broth.

5. Finally, chop the mushrooms into small pieces and add to the pot.

6. Season to taste with salt, pepper, and rosemary. Simmer for 3-4 minutes.

7. Enjoy!
Nutrition: Calories: 275 Carbs: 40g Fat: 2g Protein: 24g


Sunday, May 2, 2010

Whole Wheat Cinnamon and Raisin Banana Bread

The other day I was laid up at home, sicker than a dog. I had the strongest craving for banana bread, and I managed to drag myself off the couch to make some. I Googled healthy banana bread recipes, and was unimpressed with what I found. Most recipes were ridiculously high in calories, carbs or fats...And were probably titled 'Healthy,' only because the recipe contained fruit. Finally I found a basic banana bread recipe, and decided to give it a shot...With my own added and tweaked ingredients, of course. I swapped white flour with wheat flour, packaged apple sauce with homemade apple sauce, Splenda for sugar, and added cinnamon, raisins, flax and honey.

This banana bread is so incredibly moist, you would swear there was oil added. The banana bread doesn't have any 'healthy' after taste, and has just the perfect amount of sweetness. It is so low in calories for such a large piece, it can be eaten at any meal of the day...Including snack! You'll love this recipe, I guarantee it.

Whole Wheat Cinnamon and Raisin Banana Bread
Makes 12 servings

Dry ingredients
2 cups whole wheat flour
1/4 cup Splenda
1/2 cup granulated sugar
3 tsp baking powder
1/2 tsp bakind soda
1/2 tsp salt
1 tablespoon milled flax seed
1/2 tsp cinnamon
1 oz raisins (two miniature boxes), chopped
dash apple pie spice
Wet ingredients
1 medium apple (or in a pinch 1/4 cup unsweetened apple sauce)
3/4 cup skim milk
1 1/2 cup mashed banana
1 egg
1 tsp vanilla extract
1 tsp honey


1. Preheat oven to 350.
2. Peel and core the apple. Chop into 1/2 inch pieces. Cook in a saucepan over medium heat until very soft, adding a tablespoon of water if needed. Pulse in a food processor until the apple has reached a thick appleasuce consistency. Set aside.
3. Combine all dry ingredients in a large mixing bowl.
4. Combine all wet ingredients in separate bowl.
5. Using a spatula, stir together wet and dry ingredients until just combined. Do not over mix.
6. Pour into a large, lightly greased loaf pan.
7. Cook for 55-65 minutes, or until a toothpick inserted in the center of the banana bread comes out clean.
Enjoy!

Nutrition Info
Calories: 155
Fat: 1.2 g
Cholesterol: 18 mg
Sodium: 284 mg
Carbohydrates: 36 g
Dietary Fiber: 3.6 g

Monday, April 19, 2010

These ain't your momma's Potato Pancakes!

These Potato Pancakes are so good, I'm going to get straight to the point! They're warm and soft, quick and easy, filling AND healthy. As in, REALLY healthy. With a perfect combination of protein, carbohydrates and fat, this recipe is great for a pre-workout breakfast! Not to mention they'll keep you full all morning. Want to mix this recipe up a bit? Try adding fresh basil, roasted red peppers, chives, or whatever leftover vegetables you have from last night's dinner! I like to use fresh herbs in this recipe, but dried works just as well! So get cooking, and enjoy!
Nutrition: Calories: 225 Fat: 7g Carbs: 21g Protein: 21g
Perfect Potato Pancakes
Serves 1 (about 5 small pancakes)
1 medium potato (about 5 1/2 oz)
1 egg
2 egg whites
1 slice turkey bacon
3 tablespoons chopped onion (If you like onion, you can use up to 1/3 cup!)
1 garlic clove, medium, minced
thyme
rosemary
salt
pepper
light sour cream (optional)
olive oil
1. In a small skillet, over medium heat, cook the turkey bacon until crispy. Remove from heat and drain on a paper towel. Chop into several pieces and set aside.
2. Lightly grease the same skillet with olive oil, and saute the chopped onion and garlic until barely translucent. Remove from heat and set aside.

3. Use a box grater or mandolin, and grate the potato onto a piece of cheese cloth or a tea towel.

Gather the corners of the cloth and wring out all the liquid from the potato.
4. In a medium sized bowl, combine the chopped bacon, onion and garlic, and grated potato.

5. Next, add the egg whites and egg. Add about 1/4 teaspoon each of Rosemary and Thyme. (More or less to taste.) Season well with salt and pepper. Stir well.
6. Heat a griddle over medium low heat, and lightly grease with olive oil. Use a 1/4 cup measuring cup to pour batter onto the griddle.

7. Cook each pancake for about 2 minutes on each side, or until golden brown, and cooked thoroughly.
8. Top with a dollop of light sour cream and fresh cracked black pepper. Enjoy!