Wednesday, November 24, 2010

Keaton's Limerick Ham

When I'm asked about my heritage, I reply that I am a mutt. I'm a little bit of everything: German, Irish, English, Dutch, and Welsh. I've always envied my friends who are 100% or 50% one thing or another. They have interesting traditions, languages and traditional food. None of my immediate grandparents are from other countries, and I've never visited any of my ancestors' home countries. Growing up, and even now, I have a hard time knowing which ethnicity to associate myself with.


Although my grandparent's didn't embrace our heritage very much, my mom has made sure we learn about and celebrate our roots. We embrace our Dutch background by celebrating Sinter Klaas Day, complete with Boterletters and gift-filled wooden shoes (klompen).

We also embrace our Irish roots with a few Irish meals a year. My family's favorite is Limerick Ham. I first discovered this recipe in the book Cooking the Irish Way. Limerick Ham's distinctive flavor comes from Juniper berries and branches used in the smoking process. I made this recipe for the first time several years ago on St. Patrick's Day. I didn't have Juniper berries on hand, so I decided to tweak the recipe a bit. It turned out a success, and has been a family favorite ever since! Everyone is Irish on St. Patrick's Day, but you don't have to wait until March, this Limerick Ham turns everyone Irish, all year round!


Keaton's Limerick Ham


1 8-10 pound smoked ham, bone in
1 1/2 cups brown sugar
1/2 cup cracker meal
1/2 teaspoon ground cloves
1/4 teaspoon ground black pepper
1/8 teaspoon cinnamon
3 cups apple cider


1. Preheat oven to 400
2. In a medium sized bowl, combine brown sugar, ground cloves, cracker meal, black pepper and cinnamon.
3. Place the ham in a large baking pan. Pour the cider over and around the ham. Pack the brown sugar mixture on the top and the sides of the ham.
4. Cover with foil and bake for 20 munutes per pound, about 3 1/2 hours. Half way through cooking time, spoon the apple cider in the bottom of the pan over the ham.
5. Let the ham sit for 5 minutes, slice and serve.

Enjoy!

Saturday, November 13, 2010

Whole Wheat Focaccia with Roasted Garlic, Sun Dried Tomatoes and Rosemary

We're living in the age of technology. In so many words, technology helps us make things easier or more efficient. Facebook helps us connect with friends across the world. Iphones help us keep up with email and thousands of other tasks with the help of Applications. The Kindle give us access to thousands of books in the palm of our hands. For the most part, technology helps make life easier and more enjoyable.

Sometimes, though, technology can be a hindrance. Facebook has been known to cause drama between friends and exes more than once. Iphones and other smart phones seem to induce a zombie-like state in their many users. And the Kindle has taken away the magic of buying a brand new, stiff-paged, new-book-smell book. But the most tragic invention in the last 100 years is still used daily in kitchens across the world. It sits atop our counter tops, causing helpless individuals to fall victim of it's horrors. Scientist have projected that by 2050, this gadget will single-handedly cause the downfall of home cooking. So what is this toxic device? The bread machine. Since the 1980s, this gadget has turned home cooks into liars. That's right, throwing ingredients into a machine and pushing 'On' does not constitute homemade bread.


Okay, okay, I'm being a tad dramatic. But in all seriousness, bread making has become a lost art. Like any skill using your hands (gardening, painting, sculpting), it can be a tedious process, but rewarding nonetheless. There's almost something, dare I say, spiritual about bread making. Isn't it amazing that just by combining a few ingredients (which are boring and bland by themselves) working them with your hands and letting the dough rise, you eventually end up with a soft, warm, loaf of heaven? Whoever first thought to combine the right ingredients in the right proportions to form bread, is a saint.

Focaccia is my favorite bread, but I try to stay away from white breads altogether. But when the craving became too much to resist, I set out to make a whole wheat Focaccia that could stand up to it's white flour competitors. There's not much to say about this bread, except that it turned out awesome. I decided to really kick up the flavor, so I added roasted the garlic and sun dried tomatoes, along with fresh rosemary and lemon zest to add just that much more flavor. I am very pleased with this recipe, and I'm sure you'll enjoy it as well. There are several ways you can eat the Focaccia. Plain with a drizzle of olive oil or a pat of butter is delicious. My favorite: Cut the bread in half horizontally, and drizzle the halves with olive oil. Place under the broiler until slightly toasted. Remove, and top with slices of tomato and fresh mozzarella. Place under the broiler until the cheese has just melted. Or, slightly toast the focaccia and top with a poached or over-medium egg.

Whole Wheat Focaccia with Roasted Garlic, Sun Dried Tomatoes and Rosemary
Recipe adapted from 'Summertime Whole Wheat Focaccia Bread'

3 cups whole wheat flour
1 packet active dry yeast
1 1/4 cups warm water
1 head garlic
14 sun dried tomato halves, chopped (about 1/2 cup)
1 tsp salt
3 tbsp finely chopped fresh rosemary
3 1/2 tbsp olive oil
1/2 tsp lemon zest
Black pepper to taste
Sea salt

Roasting the garlic: Preheat oven to 375. Cut off the very top of the whole head. Remove the outer skin, leaving the cloves still in tact. Dip the cut end in olive oil.

Place on a baking sheet, and cover with foil. Roast in the oven for 50-60 minutes. Remove and let cool. Squeeze out the garlic from each clove.


Set the oven to 350.
In a small bowl, combine the olive oil, sun dried tomatoes, roasted garlic, rosemary, lemon zest and black pepper to taste. Set aside for 10 minutes.

In a large bowl, combine the warm water and yeast. Add the oil and tomato mixture, salt, and flour. Combine with a wooden spoon. If the dough is too sticky, add a bit more flour. If the dough is too dry, add a drizzle of olive oil.

On a floured surface, knead the dough in a folding motion until it has become elastic and smooth, about three minutes.


Coat the inside of the large bowl with olive oil, place the dough in it, and roll around to coat. Cover the bowl with a damp tea towel, and set aside in a dark, warm place. Let the dough rise, 30 minutes if you used quick-rise yeast, 60 if you used regular yeast.
After the dough has risen, punch it down once or twice. Again, knead the dough a few more times on a floured surface.


Place the dough onto a light greased baking sheet, and using a rolling pin, roll the dough to desired thickness- I like it about 1/2 inch thick. Poke holes with your finger all across the dough. Sprinkle with sea salt and black pepper to taste.


Bake at 350 for about 30-35 minutes. The bread will feel firm to the touch, and a toothpick inserted will remove easily.

Let bread cool for 10 minutes before slicing. Eat within 3 days, or freeze in a zip top bag. Enjoy!

Wednesday, November 3, 2010

Apple Cider Chicken and Seasonal Vegetables with Sage

What comes to mind when you hear the words 'Comfort Food'? Mashed potatoes with gravy? Southern fried chicken? Warm biscuits with a pat of melting butter? Unfortunately, many of our favorite comfort foods are some of the worst for us. However, with a little tweaking and a dash of know-how, you can cook a comforting and healthy meal, without sacrificing flavor.


When I awoke yesterday morning and saw frost on the grass outside, I knew it was the perfect day to make dinner for my family. What's better than sitting down on a cold evening, and enjoying a warm, filling meal together? Not much, in my book! My parents are from Iowa, so their idea of supper is meat, potatoes with gravy, and vegetables covered in butter. Tasty, but not exactly the most heart-friendly meal. So when I'm cooking for my parents, I like to make it hearty yet healthy, and simple but flavorful.


I've said it before and I'll say it again- I LOVE using seasonal produce. There's something almost spiritual about using the fruits and vegetables that flourish in each season. Not to mention they're at the peak of ripeness and flavor! Another favorite seasonal ingredient? Apples. They're no longer just for brown-bag lunches and snacks on the go. Apples pair wonderfully with Autumn's wide variety of seasonings and produce, so I decided to make it the star of our meal. I roasted a whole chicken with apple cider and herbs. Then, I combined apples with parsnips and carrots, and seasoned them with salt, black pepper and sage. Finally, I reduced apple cider and served it to drizzle over the vegetables and chicken. It was the perfect ending to such a chilly night. My family loved it, and we decided it was 'blog worthy,' so here it is!

Apple Cider Chicken and Seasonal Vegetables with Sage Serves about 3 with left over chicken

1 whole chicken
1 1/3 cup medium diced carrots
3/4 cup medium diced parsnips
2 1/3 cup large diced apples
2 cups apple cider plus a couple of tablespoons
Fresh Rosemary
Dried Sage
1 dried Bay leaf
Dried Thyme
Sea salt
Black pepper
Olive oil
Ground cloves

Special Equipment: Deep dish chicken cooker like this or an oven safe bowl and a beer or soda can.

1.Preheat the oven to 375 degrees.

2. In a bowl, combine 1 cup apple cider, 1 teaspoon fresh Rosemary, 1/8 teaspoon black pepper, a pinch dried Thyme, a small pinch ground cloves, and a whole bay leaf. If you're using the chicken cooker, pour the mixture into the well. If you're using an oven safe bowl and a can, pour the mixture into the empty can, and set in the center of the bowl. Place the chicken on top of the well or the can (make sure the chicken is steadied by the sides of the bowl, so the can won't spill)

3. Brush the chicken with olive oil, and season with sea salt and black pepper.

4. Place the chicken in the oven and roast for about 45 minutes, checking at 30 minutes. The thighs should reach an internal temperature of 180 degrees.

5. In a small sauce pan, combine about a cup of apple cider, a pinch of black pepper, and a few sprigs of Rosemary. Boil the cider until it has reduced by half, about 10 minutes.

6. To cook the vegetables, heat a large skillet over medium heat. Lightly coat the bottom with olive oil. Add the carrots and cook for about 2 minutes, stirring frequently. Next, add the parsnips. Add about 2 tablespoons apple cider, cover, and cook for about 5 more minutes. When the carrots and parsnips are nearly tender, add the apples and sprinkle with dried sage. Toss and cook until the apples are slightly softened.

7. When the chicken has finished cooking, let it rest for about 10 minutes before carving.

8. Serve the reduced cider on the side to pour over the chicken and vegetables. Enjoy!

Thursday, October 28, 2010

Low-Fat Pumpkin Chai Latte


I'm sure everyone will soon be sick of all my pumpkin posts and recipes, but Fall only rolls around once a year. I must take advantage of all the seasonal produce! This morning I was in the mood for a Starbucks Chai Latte and a Pumpkin Latte, but I had hip surgery two weeks ago, so I can't drive. Stranded at home, with a whole lot of time on my hands, I set out to make the ultimate combination of my two favorite drinks. Who doesn't love pumpkin? It instantly produces a comforting, warm and fuzzy feeling, not unlike that feeling when you're seated for Thanksgiving dinner with your family. Hot Chocolate has taken a back seat and Chai tea has surfaced as the newest warm-me-up-on-a-cold-day-drink. Combining the two was a no-brainer, and it turned out wonderfully. Not only is it tasty, but this latte is also packed with health benefits. Black tea and cinnamon contain powerful antioxidants and pumpkin is packed with vitamins and fiber. You can use decaf or regular tea, and of course, adjust spices to taste. So get steeping, and go curl up with a nice book!

Low-Fat Pumpkin Chai Latte
Serves 2

2 cups water
2 black tea bags
1 cup skim milk
1/4 cup canned pumpkin
1 slice fresh ginger (about 1 /8 inch)
1 cinnamon stick
1/2 vanilla bean
Freshly ground nutmeg
Ground cinnamon
Ground cloves
1 teaspoon honey

In a medium sauce pan, heat the water to a simmer. Split the vanilla bean in half and place on a piece of cheesecloth along with the sliced ginger, cinnamon stick, a pinch of ground cloves, about 1/8 teaspoon ground cinnamon, and a pinch of freshly ground nutmeg. Tie the cheesecloth and place in the simmering water with two tea bags. Turn off the heat and steep for 3-5 minute, then remove the tea bags. In a bowl whisk together the milk and pumpkin. Take a ladle of the tea and whisk it into the pumpkin and milk mixture. Slowly whisk about one third of the tea into the milk and pumpkin. Now, slowly pour the milk and pumpkin into the sauce pan and stir. Cook over low heat for about 3 minutes. Remove the cheesecloth and discard. Stir in the honey and serve.


Calories: 64 Fat: .3g Carbohydrates: 11.3g Fiber: .9g Protein: 4.5g

Tuesday, October 26, 2010

Pumpkin Dog Biscuits

With just 5 days left until Halloween, pumpkins are everywhere! You may know that pumpkin is packed with powerful nutrients. But did you know that these nutrients are beneficial to your dog, too? The fiber in pumpkins has long been a cure for dogs with gastrointestinal issues. But many of the vitamins and minerals found in this popular squash work the same way in dogs as they do humans. Vitamin C helps boost immune function, potassium promotes bone strength, Beta- and Alpha- carotenes help ward off cancer, and Vitamin A protects eyes from cataracts- a big concern for older dogs.

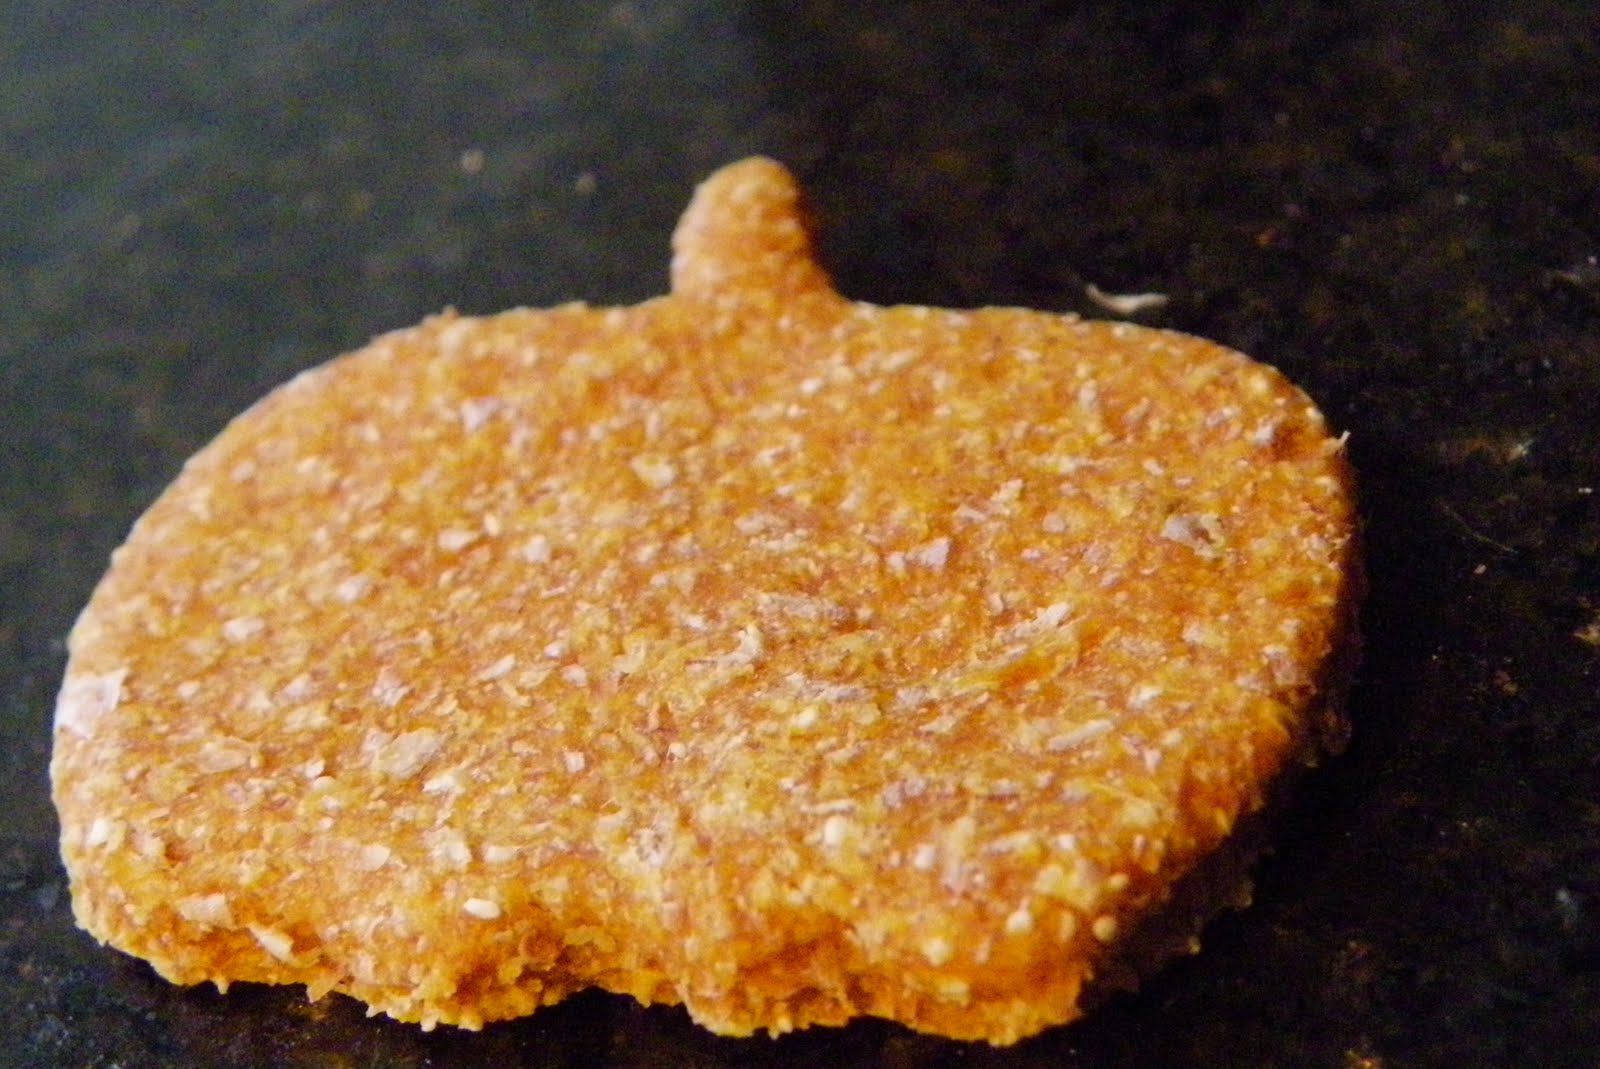
I love my dogs like family, so I wanted to create a healthy treat for them to enjoy. In light of the upcoming holiday, I decided to make these Pumpkin Biscuits. They're really easy to make, and very healthy too- no fat! Just make sure to let the family know they're for the pets, because they look identical to cookies! If you get a lot of tag-along canine trick-or-treaters, these make wonderful treat bags. Just wrap a few biscuits in cellophane, and tie with orange and black ribbons. The dogs will love them, and the kids will be just as excited. Happy Halloween!


Pumpkin Dog Biscuits

2 1/4 cup whole wheat flour
1/4 cup old fashioned oats (uncooked)
1/4 cup cornmeal
1/2 cup canned pumpkin
2 egg whites
pinch cinnamon

Preheat oven to 275. In a large mixing bowl, combine dry ingredients. In a separate bowl combine pumpkin and egg whites. With a large spoon, mix wet ingredients into dry ingredients. Once the mixture has come just come together, use your hands to incorporate all the ingredients together and form a large ball. The dough should be slightly tacky but not sticky. Knead more flour into the dough if it is too sticky. Roll out the dough with a rolling pin to about 1/8 inch thick. Use cookie cutters (I used pumpkins, and maple leaves) to cut out shapes. Bake the biscuits on a foil or parchment lined cookie sheet for about 1 to 1 1/2 hours, or until hard. Cool the biscuits on a cooling rack.

Tuesday, October 12, 2010

Roasted Pumpkin Seeds

This October when you're carving a pumpkin, save the seeds. They're so easy to roast, and they make a delicious, healthy snack. Pumpkin seeds, also known as Pepitas, are packed with all kinds of nutrients, such as manganese, magnesium, iron, vitamin K, and protein.

Roasting your own pumpkin seeds is a fun activity for the whole family. There's something special and rewarding about eating pumpkin seeds that you've harvested, cleaned, roasted and seasoned. Store-bought seeds are no match for homemade!

I've included basic instructions and recipes on how to prepare the seeds, but it's up to you to experiment and tweak the seasonings to your liking. There's no right or wrong way to make them. If you have a favorite combination of seasonings and spices, please share!

Harvesting and Cleaning the Seeds
Different pumpkins have different seeds. Your typical carving pumpkin provides large seeds with a white husk. Small baking pumpkins have little seeds without the husk. What kind you use is completely personal preference. If you just like the inside seed, go with the baking pumpkin. If you like the tough husk, use the carving pumpkin.

Cut off the top of the pumpkin and scoop out the seeds and pulp. Separate the seeds, you don't need the pulp so throw it away, or even better, toss it in your compost pile. Put the seeds in a colander or strainer, and rinse under warm water, cleaning off any leftover pulp and goop (yes, that's a technical term). Once the seeds are clean, shake off all remaining water, and transfer them to a tea towel. Spread the seeds over the towel in a single layer, and roll up the towel. Let the seeds dry completely.

Roasting the Seeds
There's a few ways you can roast your seeds. You can use a Silpat (a silicone baking sheet), a cookie sheet lined with foil, or my favorite, parchment paper with holes. The first two are pretty straightforward. I like to use the parchment paper method because it allows air to circulate underneath the seeds, which leads them to cook more evenly and be very crunchy. It just takes a few minutes, and from my experience, is well worth the time.

First, place a cooling rack on top of a cookie sheet. Place a piece of parchment paper on top of the cooling rack, large enough to be tucked underneath the rack on the sides. Using something small and sharp to poke holes all over the paper. (Think push pin or an eyeglass screw driver) The holes need to be large enough to allow air to circulate underneath the seeds, but small enough so the seeds don't fall through. You need a lot of holes.

We're ready to roast. Spread the seeds on your surface of choice If you have a convection oven, preheat it to 325 and cook the seeds for about 8-10 minutes. If you have a conventional oven, preheat it to 350, and cook the seeds for 10-15 minutes. Again, cooking time is personal preference. If you like your seeds a bit chewy, cook them for a shorter amount of time. If you like them very crunchy, cook them for a longer amount of time. Just keep an eye on them, because once they're burnt, they're burnt.

Just about every recipe I found online seasoning the seeds before roasting. This way, you can cook all the seeds at once, then divide them and season them, instead of having to use a different pan for each 'flavor.' So following are a few basic recipes. Again, personal preference. Alter, experiment, omit. Use these recipes as a starting point.

Garlic and Herb
1/4 cup roasted seeds

1/8 teaspoon garlic salt

1/4 teaspoon dried thyme

1/4 teaspoon dried basil

1/4 teaspoon dried rosemary

Olive oil

Combine the salt and herbs together. Very lightly coat the seeds with olive oil, and add them to the herb mixture. Toss to coat, and spread the seeds on parchment paper to dry.


Black Pepper, Sea Salt and Olive Oil
1/4 cup roasted seeds

1/4 tsp olive oil

black pepper

sea salt

Toss the seeds with the olive oil. Next, season the seeds with black pepper and sea salt to taste. Spread the seeds on parchment paper to dry.


Autumn Spice Candied Pumpkin Seeds
1/4 cup roasted seeds

1 teaspoon maple sugar (brown sugar works fine, but maple sugar is really spectacular)

1/8 teaspoon cinnamon

a pinch of ground ginger

a pinch of nutmeg

water

In a small bowl, combine just enough water with the maple sugar to make a think paste. (1 or 2 drops is plenty.) Heat in the microwave for 5 second intervals, until the sugar has melted. Stir in the cinnamon, ginger and nutmeg. Add the pumpkin seeds and stir to coat. Pour the seeds back onto a nonstick baking surface (parchment or Silpat) at 350 for 2-3 minutes. Remove from the oven and let cool on the baking sheet.


Make your own recipe by experimenting with different herbs and spice. A few may include cayenne, paprika, oregano, cumin, and seasoning salts.

Store the seeds in a zip-top bag in a cool, dry place. Enjoy!

Friday, October 8, 2010

Tri-Color Asian Salad


I'm all about simplicity. Less is very often more. That's why this salad has 3 main ingredients, cucumber, carrot, and jicama, and a very simple dressing. It's light, fresh and wonderfully crunchy. If you've never tried jicama, this is a great opportunity. Jicama is a root that looks like a turnip. It is very sweet, and it's texture is similar to a potato. This salad is low in calories and packed with nutrients. This dish is also a perfect time to practice your knife skills. We'll be cutting the carrots into batonnets (1/4 x 1/4 x 2-2 1/2 inches), and julienning (1/8 x 1/8 x 2-2 1/2 inches) the jicama, and simply cutting the cucumber slices into 6 equal pieces. To learn how to batonnet click here. To learn how to julienne, click here.

Tri-Color Asian Salad
Serves one

12 slices peeled cucumber, each cut into six pieces
8 baby carrots, batonnet
1/3 cup julliened jicama
1 teaspoon orange juice
1 teaspoon soy sauce
1/2 teaspoon rice wine vinegar
1/8 teaspoon honey
Pinch freshly grated ginger
Pinch freshly grated lemon zest
Black pepper to taste
Sesame seeds

Mix the vegetables together in a bowl. In a small bowl, combine the orange juice, soy sauce, rice wine vinegar, honey, ginger, lemon zest and black pepper. Add the dressing to the vegetables, toss together quickly. Use tongs to place the salad on a plate, and sprinkle sesame seeds on top. Enjoy!

Calories: 54 Carbs: 12g Fiber: 4g Fat: 0g Protein: 2g